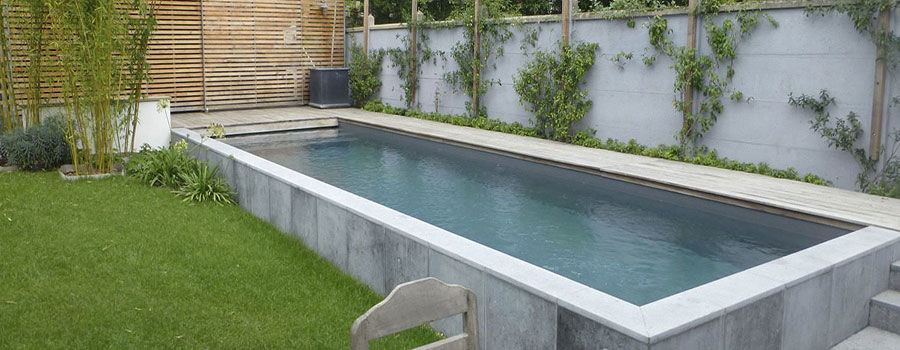
Concrete pond takes several weeks to complete with mixing cement and sand, transporting barrows and all other stuff makes part of the concrete pond process.
There’s nothing to be afraid of if you have never installed concrete before. There is a plethora of reference books and materials available online regarding the installation. This article will only cover some of the basics here.
Good concrete pond construction means taking the right steps as there are no shortcuts. Taking short routes or improper steps can lead to more expenses on repairs, maintenance or even replacement than the actual/initial cost of the construction. A good concrete pond construction is one that lasts longer or a lifetime. Follow these basic rules so as to get started.
PLANNING
Make sure the ground on which you will put the pool is completely stable. Otherwise, you may need to bed the pool into a layer of compacted hardcore. Remember that a suitable concrete pond requires a thickness of four to six inches.
DIG
After making a proper plan and figuring out the dimensions, all soil and rocks should then be dug out. Structures/forms need to be built and properly placed where concrete is to be poured. This should be done along with the proper positioning of cut-to-fit rebar (reinforcement bars).
BUILDING THE POOL
Make the bottom of the pool by pouring concrete over a layer of hardcore. Wire mesh should be included between two layers of concrete and left to set. The shuttering must be built so that it is completely rigid and easily taken apart. The shuttering should be built with mesh embedded in the sides before adding the concrete. When the concrete is dry, remove the shuttering and coat the base and sides of the pool with a restrictive waterproof sealant.
In concrete pond construction, pouring the cement should be done in one day; unless you are constructing a very large pond then it must be poured in sections. Keep in mind that cement has to be poured in the bottom of the pool first before the sides. Next, if shelves have been dug out, pour cement there. Lastly, pour cement for the top of the pond and for the coping as well.
After these steps have been completed, it is time to let the cement cure for several days under plastic. At this stage, treating with muriatic acid helps prevent high pH levels in water, which is beneficial to plants and fish. It is also recommended that after the acid treatment you apply several coats of paint made from masonry or pools sealant, allowing each coat to dry completely.
When mixing, make sure you mix in the right proportions of the cement, sand, water, and other materials (if necessary). If wrongfully mixed, the pool will leak and cracks may occur if the foundations subside.
Ready-mixed concrete is quite easy to work because they have been made with the right proportions. Its only drawback is that you must be ready to use everything on the day it is delivered. You should also consider how you will transport your load of cement from where it is brought to the site of your pool.
Tragically, poured concrete is prone to cracking. If you do not build the pond with concrete, it is likely you may inherit such a pond. All you have to do is to discover your pond leaks and begin short-term repairs immediately.
Once you have discovered the crack, use a club hammer on a thin stone chisel to widen it- this should be done gently and slowly. Then, clean away all the debris with a stiff brush. Mix the mortar and use a trowel to fill the crack. Give it at least 48 hours to dry before applying a coat of a pool sealant to the crack to prevent harmful substances from spilling into the water.
TOOLS REQUIRED FOR THE CONSTRUCTION OF CONCRETE POND
ðstring
ðshovels
ðtrowels
ða wheelbarrow
ðpicks
ða crowbar
ða level
ðstakes
ða long two-by-four
ðsheets of plastic
Concrete pond construction can be an exciting experience. It is best to begin with a smaller pond before moving on to a larger project if you achieve success. The amazing thing is when you get the basics of concrete pond construction; you will find all other similar construction easy. So learn, plan, design, build, and then build again and again.
The trickiest part of building a large concrete pool is the need for shuttering. Shuttering is used to hold the hold the concrete in place while it sets. If shuttering is neglected, there is a danger that the concrete will slide down the walls, making it thinner at the top and bulging at the bottom. The shuttering is a topless, bottomless box made of wood. They are smaller in all dimensions by the thickness of the concrete and should be built inside the pool when the bottom/base has been completed.
NOTES
For those having heavy clay as their garden soil, remember that it tends to shrink in the summer season simply because this type of soil isn’t good for your concrete. For preventing this, lay 3 inches (8cm) of moist builders; sand layer. If your garden soil is sandy, you don’t need to lay the layer of moist builders’ sand.
Your pond size will determine how heavy reinforcing materials would be. Larger ponds should include heavy reinforcing steel mesh or gauge wire mesh. It is also very important that the concrete leaves no spaces around the mesh by completely filling the holes. A very large pond will need steel reinforcing rods.


