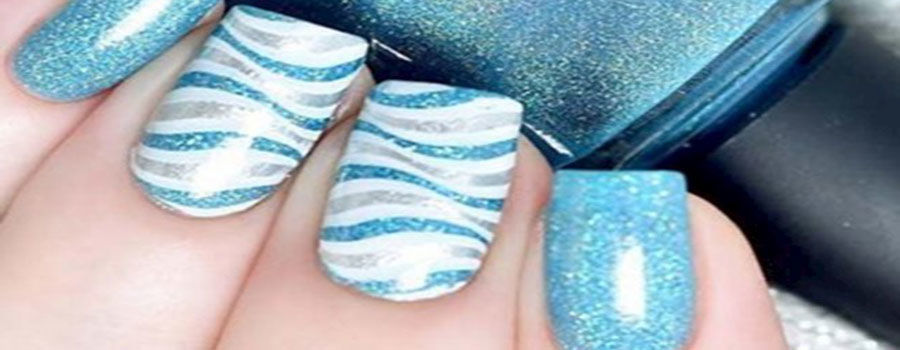
Did you know that summer nails tend to depict your overall personality because the designs for summer nail art come in a wide assortment and experimenting new ideas is always welcome? Yet again here’s another fabulous nail art design; glitter waves! It brings the image of splashy waves and rocky beaches, doesn’t it? Also, it invigorates you to have some fun with the waves and play around by the ocean. You can carry this beautiful breathtaking nail art to the ocean on your nails by following the steps given below:
Full Glitter Wave Nail Art:
You are definitely going to feel yourself swirling over these breathtaking deep oceanic waves. The white base and sparkly glitter make it all a lot more mesmerizing!
STEPS:
- Before applying any nail color, apply a clear base coat on all your nails.
- While they dry, take out the colors you'd like to use to create a glittering wave nail art. In this design, glittery sea blue, glittery silver, and matte white nail colors are used.
- Paint your middle and ring fingernails with regular or matte white nail polish.
- Paint rest of your fingernails with glittery sea blue nail color.
- Alternatively, use glittery silver and glittery sea blue nail polish to create wavy line horizontally on the middle and ring fingernails using a thin striper brush. (refer to the picture)
- Apply a matte top coat on the nails to finish off glitter wave nail art.
This is the best summer design you would come across; easy and lovely! If the ocean is your second home then you’ll be overwhelmed with this nail art once you’re done. Go ahead and try it out but don’t forget to flaunt off these glittery wavy nails to your mates while playing volley at the beach!


