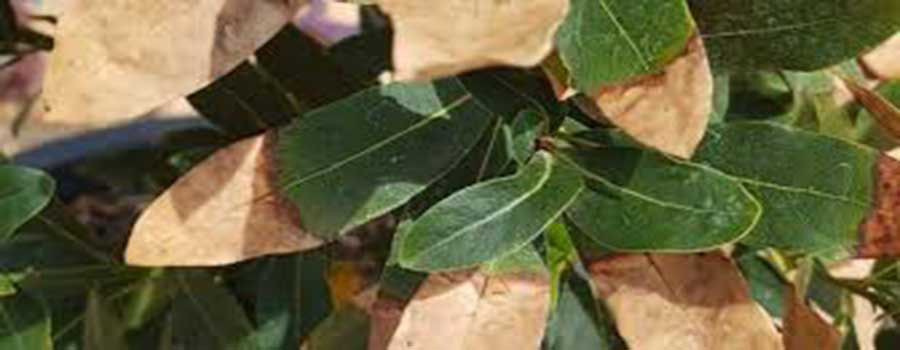
Any plant can survive as long as you understand how to treat them as soon as they are planted or brought into your home. If your new growths are dying, and you are unsure why then there are some things you can check. Amazingly, it is possible to save a dying plant, but you must first detect what is wrong quickly in order to rescue them. It is important to check so many conditions such as:
- The type of soil used
- The fertility of the soil
- Over and under watering your plants
- Exposure to light
- Pest and diseases, among others.
- Now, why are new growths dying?
- Harmful Insects and Diseases
One of the most obvious reasons is that the new growth quickly houses harmful insects and diseases that eventually lead to its death. Beetles, anthracnose, and chestnut blight are some examples of harmful insects and disease that are capable of destroying new plants.
- Transparent Leaves
A lack of potassium or iron in the soil could cause transparent leaves. Or, this may occur as a result of dying chloroplasts in the leaves. Ensure that you have enough light and that the correct measurement of fertilizer is properly added. Sometimes, hard and alkaline water is the culprit. In this case, consider using distilled water on the soil or when you change the tank water (if it is in an aquarium).
- Too Much Herbicide
It is a known fact that too much of anything is very bad. When too much herbicide is applied, it may lead to the death of new plants or other plants. The components found in herbicides are enough to change the color and shape of any plant, if applied in excess. This leaf damage is why you shouldn’t apply herbicides very close to your plants.
- Lack of Vitamins And Iron
Lack of vitamins and iron leaves dark spots on the leaves of plants. Check with your store for vitamin and iron supplements that can be added to the soil on which your plant lie on a regular basis.
- Insufficient light
Light is very important to any plant, especially new growths. No matter how much food, water or fertilizer you supply to your plant, if you don’t provide enough light for it, it will not survive for long and will eventually die off. Nowadays, most tanks come with pre-drilled holes that will allow you to set up your own lighting; others come with the light attached to the tank top. In fact, most acrylic tanks will allow you to drill your own holes and install a light. Obviously, another wonderful alternative is simply to place your pond or aquarium on the south side of your house or apartment, close to a window where it will surely get light in abundance
- Fungus
Hair-like growth on the leaves of new plants usually signals fungus. There are basically two ways to correct fungus growth in the tank. The first is stock the tank with grass shrimp or some algae eating fish. The other way is to physically brush it off using your hand.
- Plant Crowding
Plants need enough space to grow. In a crowded pond or aquarium, you have too much competition i.e. plants fighting for the few nutrients and oxygen that is being supplied. Giving your plants a lot of space to grow is a great way to fix this problem. Provide them with a large aquarium that will accommodate its future growth spurts. If it begins to get somewhat clumsy, you should try trimming every now and again – it helps to control its growth.
GENERAL FIXING PROCEDURES
- Checking Your Soil
Your soil may lack enough nutritional balance and this may wind up destroying your plants. Ensure that your plants have enough nitrogen, potassium, and phosphorus. Add magnesium or calcium as backup nutrients if conceivable. You can also use a pH meter to check whether the quality of your soil. An electronic pH meter or a strip tester can be used to achieve faster results.
- Indoor Climate
Your new plant must be gradually introduced to an indoor climate. It is best if you keep the plant outside where it can be easily moved from excess light to a more shaded spot inside. You have to consider the fact that your house is naturally less humid than the outdoors. After exposing your new plants in full sunlight for a week or two, set them in filtered shade outside for a few weeks. Then, as you head towards the end of the summer you can place the plant on shady yard and then take them indoors finally. This transition is best completed before the period of cold weather. This will ensure that you won’t bring the plant indoors when the heat comes, because the indoor environment becomes drier than normal during this period.
- Applying Fertilizer In The Right Proportion
If your garden lacks enough nutrients, then add fertilizer, compost or extra soil. When buying store variety soil, make sure to take note of the ingredients labels to see exactly what it is made of. Make sure there are low levels of salt in any compost or fertilizer. You can also use green materials such as banana peels or grass clippings as a direct technique for stimulating your dying plants. Also, remember to add compost and fertilizer based on when your plant needs it.
NOTE
If you are trying to save a dying house plant, try switching to a pot that is well drained and of higher quality. A well-drained pot is one of the best ways to prevent excessive water from sitting in your soil.


