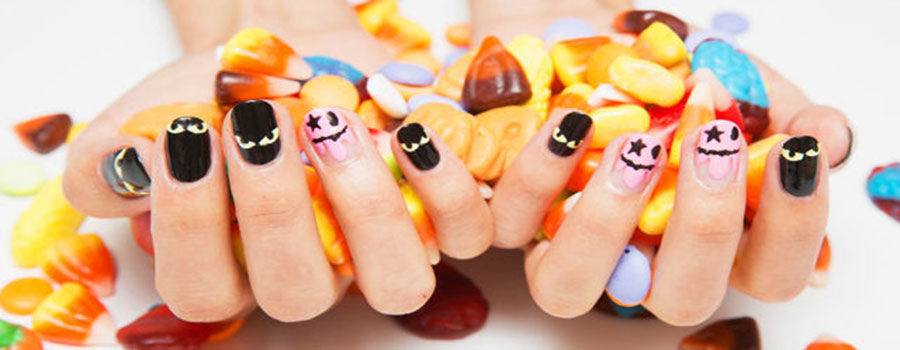
Halloween isn’t only about choosing some freaky costume but in fact demands a complete physical transformation. To attain your Halloween perfection, selecting a suitable nail art will prove its worth. It’ssure to impart a unique look for your Halloween night functions and gatherings. With our step by step guide, you will be able to design and draw the nail art of your choice with ease. Practice your design a couple of times, and you will be able to get a professional look for your Halloween nail art at home.
Spider Cobweb Nails Design:
Whenever it is about spookiness, cobwebs are the first element to come into play immediately. The strange effect offered by the cobweb nail art is fascinating and indeed superior to other famous Halloween nail arts. It’s creepy, spooky but exquisite at the same time. Now stop planning to visit a professional nail artist to attain this flabbergasting nail art and start right away.
STEPS:
- Choose any coloras the base of the nail art.
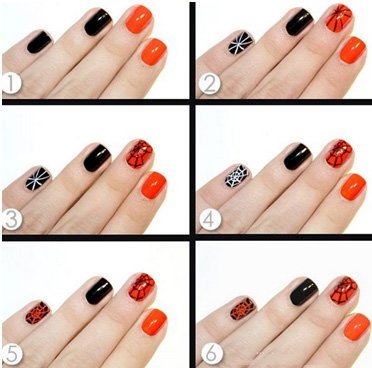
- Choose two contrastcolors on every other finger. It is always the most stylish choice. For the Halloween, go with black and orange base colors as they are very prominent and will let the black and white web look eminent.
- Paint the base with black and orange smoothly so that there are no over do’s or gaps left. Use a rather thicker nail brush for this purpose.
- Choose awhitecoloron black and black color on orange base for drawing the best web structure.
- Pick a center point of the nail. This can be at the center, towards the periphery or anywhere on the nail.
- Draw two crosses intersecting each other on each nail.
- Make small curvy lines to interconnect these lines along the length to give a compact formation.
- Spray the water repellent to make it look shiny and brighter.
Halloween nail art should match the mysterious and spooky element of the whole theme. Using black and orange color is always the safest choice for Halloween but you can play with the colors of your choice or to suit your outfit and theme.


