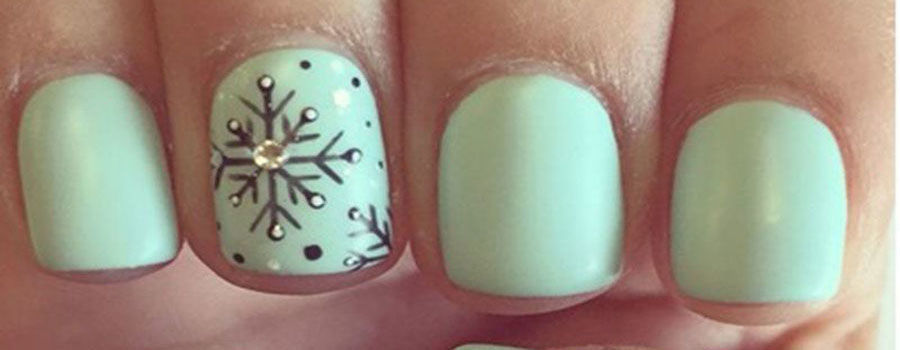
The best part about Christmas and winter is the comeback of snowflake nails. More importantly when it’s about the classic snowflake accent nails then it’s totally up to you which finger you wish to put your creativity on. As of today the most elegant and intricate nail art that the professionals are providing the customers with is the snowflake one. But why not learn to recreate snowflake accent nails at home? Designing snowflakes accent nails is pretty simple. Let the steps mentioned below make you believe in the simplicity of its design.
Full Snowflake Accent Nail Art:
The snowflake accent nail art may appear difficult to design at home but once you go through the following steps, you will have no issues duplicating it on yours or your sister’s nails.
STEPS:
- Select a base color in light shade. Here, mint green color is used. To apply, use a thick brush as it leaves a smoother opulent coat.
- Once the base color dries up to get ready to draw cute snowflakes. Use a thin brush with black nail lacquer to highlight the snowflake on the light colored base. Alternatively, you can use a dark base like blood red and use white color to create snowflakes also.
- Use a thin brush to make a cross on the accent nail you wish to.
- Cut this cross with another straight line.
- Now mark two arrow heads on each line away from the center point.
- To highlight the snowflakes, repeat the process thrice. You can put tiny dots too, just to mimic the snowfall.
- In the end, spray it with clear water repellent to help it last longer on your nails.
- You can sprinkle some glitter to add more elegance to it and complete the look of snowflake accent nails.
Don’t hesitate to follow the steps given above and show off your hands. You will fall in love with the cute snowflake accent nail art. Other than mint green you can use any other refreshing color as the base. Be it blue, purple or red, the results will be striking.


