


HDMI and optical can both work for karaoke systems, but they are not the same kind of connection and they do not solve the same problems in the same way. For home karaoke, the best choice is usually the one that gives you the cleanest TV-to-karaoke audio path, the fewest compatibility issues, and the lowest real-world delay.
That is why the question is not just “which one is better?” The better question is “which one is better for my karaoke setup?” A connection that feels perfect in one living room can be frustrating in another if the TV settings, system inputs, or signal chain are different.
Table of Contents
- Quick Answer
- 1. Why This Choice Matters in Karaoke
- 2. What HDMI and Optical Actually Do
- 3. What Karaoke Systems Really Need From a TV Audio Connection
- 4. When HDMI Is the Better Choice
- 5. When Optical Is the Better Choice
- 6. HDMI vs Optical: Side-by-Side for Karaoke
- 7. Which One Has Less Delay?
- 8. Best TV Audio Settings for Karaoke
- 9. Real-World Setup Examples
- 10. How to Choose in 60 Seconds
- Common Mistakes to Avoid
- Related Reading
- FAQ
- CTA
Quick Answer
Optical is often the simpler and more predictable choice for home karaoke when you just need clean TV audio sent to the karaoke system. HDMI is often the better choice when your setup supports ARC or eARC properly and you want a more integrated TV-based system.
For karaoke specifically, the most important things are usually stereo PCM compatibility, stable connection behavior, and low real-world delay. In many home setups, those matter more than theoretical format advantages. If your system works cleanly over HDMI ARC or eARC, that can be excellent. If not, optical is often the easier way to get reliable music playback into the karaoke system.
1. Why This Choice Matters in Karaoke
In normal TV viewing, a small connection problem may be annoying but still manageable. In karaoke, connection issues become much more obvious because karaoke combines music playback + live microphones + real-time singing. That makes timing, balance, and compatibility much more important.
If the TV audio path is messy, you may run into problems like:
- Noticeable lip-sync delay
- Music arriving later than expected
- Audio format mismatch
- TV settings that keep changing the sound
- A setup that works for movies but feels bad for singing
This is why HDMI vs optical matters more in karaoke than many people expect. The right connection can make the system feel simple and natural. The wrong one can make a good system feel confusing or unstable.
If your main source is YouTube karaoke on a TV, also read Ultimate YouTube Karaoke Setup Guide.
2. What HDMI and Optical Actually Do
Both HDMI and optical can carry TV audio to your karaoke system, but they do it in different ways.
HDMI in karaoke setups
In home karaoke, HDMI usually matters because of ARC or eARC. These allow audio to travel between the TV and the connected audio system over the HDMI connection path. In practical terms, that can make the setup feel more integrated, especially in living-room systems built around the TV.
Optical in karaoke setups
Optical is a dedicated digital audio connection. It is simpler in concept because it is only about audio. In many karaoke setups, that simplicity is an advantage. You send the TV’s digital audio output to the karaoke system, and the karaoke system handles the music side while microphones stay connected directly to the karaoke system.
For most home karaoke use, you are not choosing between “good sound” and “bad sound.” You are choosing between two different connection styles with different strengths in compatibility, convenience, and troubleshooting.
3. What Karaoke Systems Really Need From a TV Audio Connection
Many home karaoke systems do not need advanced theater-style audio formats to work well. What they usually need is much simpler:
- Stable stereo music playback
- Clean compatibility with the system input
- Low enough delay for comfortable singing
- Predictable behavior across TV apps and sources
- Easy control over music and microphones separately
That is why the best connection for karaoke is often not the one with the most technical potential. It is the one that fits what the karaoke system actually expects.
In many real home setups, karaoke systems work best when the TV sends a straightforward stereo signal and the karaoke system handles the microphone side locally. That is a very different goal from building a surround-sound home theater.
If you want the most practical TV-centered setup path, read Karaoke Setup for TV + YouTube + Wireless Microphones.
4. When HDMI Is the Better Choice
HDMI is often the better choice when you want a more integrated home entertainment setup and your equipment supports it cleanly.
HDMI usually makes more sense when:
- Your karaoke system supports HDMI ARC or eARC properly
- Your TV and audio system already revolve around HDMI connections
- You want simpler day-to-day control in a TV-centered room
- You want fewer separate cables in a more permanent setup
- Your system behaves consistently with TV apps and external sources
Why HDMI can be attractive
- More integrated with the TV environment
- Cleaner living-room cable logic in some setups
- Can be convenient when everything is built around the TV as the center
But HDMI only feels better when it actually behaves better. If ARC handshakes are inconsistent, if the TV keeps changing audio behavior, or if delay becomes noticeable, HDMI can become more frustrating than helpful in a karaoke environment.
5. When Optical Is the Better Choice
Optical is often the better choice when you want a more direct, audio-only path from the TV to the karaoke system. In many home karaoke rooms, that makes troubleshooting easier and day-to-day use more predictable.
Optical usually makes more sense when:
- Your karaoke system has a clean optical input
- You want a straightforward TV audio connection
- You are trying to simplify the signal chain
- Your HDMI ARC behavior has been inconsistent
- You mainly need stereo music playback for karaoke
Why optical is popular in karaoke
- Audio-only path keeps things simpler
- Often easier to troubleshoot
- Commonly works well for TV-to-karaoke audio feed
- Well suited to setups where microphones stay fully inside the karaoke system
Optical can be a very smart choice when the goal is not theater complexity but reliable karaoke use.
6. HDMI vs Optical: Side-by-Side for Karaoke
| Factor | HDMI | Optical |
|---|---|---|
| Main strength | Integration with TV-based systems | Simplicity and predictability |
| Best use case | Permanent TV-centered setups with solid ARC/eARC support | Straightforward TV audio feed into the karaoke system |
| Karaoke friendliness | Excellent when compatibility is solid | Excellent when you want fewer moving parts |
| Troubleshooting difficulty | Can be more complex | Often easier |
| Daily convenience | Can feel more integrated | Can feel more direct and stable |
| Best mindset | Choose it when the system truly supports it well | Choose it when you want a clean, practical karaoke signal path |
For most home karaoke buyers, the real answer is not “HDMI always wins” or “optical always wins.” The real answer is: choose the one that gives your karaoke system the cleanest usable TV audio path with the least friction.
7. Which One Has Less Delay?
There is no universal winner here because delay usually depends more on the entire signal chain than on the cable type alone.
Real-world delay can come from:
- TV audio processing
- TV sound modes
- Audio format conversion
- Extra devices in the chain
- Wireless processing layers
- Using multiple sound outputs at the same time
That means HDMI may be lower delay in one setup and optical may feel better in another. In karaoke, the only answer that matters is the one you hear in your room.
Good rule of thumb
If both connections are available and both are supported properly, test them with the same song, same TV settings, and same karaoke system settings. The better connection is the one that feels more natural to sing with.
If delay is already causing problems, also read Common Karaoke Problems and How to Fix Them.
8. Best TV Audio Settings for Karaoke
No matter which connection you choose, TV settings can make or break the result. A technically correct connection can still feel bad if the TV is processing the sound in the wrong way.
Best practical settings to check
- Set TV audio output to the connection you are actually using
- Use a simple stereo output mode when the karaoke system expects it
- Turn off unnecessary sound enhancement modes if they increase delay
- Avoid running TV speakers and karaoke speakers together
- Let the karaoke system handle microphone mixing and vocal effects
For many karaoke systems, a straightforward PCM-style stereo feed is the safest approach. If the TV is sending a format the karaoke system does not handle well, the result may be missing audio, unstable playback, or awkward delay behavior.
Once the TV audio is clean, the next job is balancing the karaoke system itself. For that, read How to Set Mic Volume, Music Volume, Echo, Bass and Treble.
9. Real-World Setup Examples
Setup A: Smart TV + karaoke system + wireless microphones
This is the most common home arrangement. If the karaoke system supports HDMI ARC cleanly, HDMI may be the most integrated option. If you want a simpler audio-only path, optical is often the easier solution.
Setup B: TV + streaming device + karaoke system
If you use a streaming device for YouTube karaoke, the best connection is still the one that gets the TV audio cleanly into the karaoke system. In many rooms, optical keeps this simple. In others, HDMI ARC works beautifully if everything is stable.
Setup C: Family room with casual YouTube karaoke
In this kind of setup, simplicity usually matters more than advanced format support. Optical often works well because it is direct and easy to manage. HDMI is still a good option when supported properly, especially if the room is built around a more integrated TV environment.
If you want the full room-ready setup guide, read Ultimate YouTube Karaoke Setup Guide and Karaoke Setup for TV + YouTube + Wireless Microphones.
10. How to Choose in 60 Seconds
Choose HDMI if most of these are true:
- Your karaoke system supports ARC or eARC properly
- You want a more integrated TV-centered setup
- Your current HDMI behavior is stable and easy to use
- You prefer the cleaner living-room workflow
Choose optical if most of these are true:
- You want the simplest audio-only TV connection
- Your karaoke system handles optical cleanly
- You are troubleshooting delay or compatibility issues
- You mainly need a practical stereo music path for karaoke
If you are unsure, start with the connection your karaoke system handles most cleanly. For karaoke, stability beats theoretical advantage.
Common Mistakes to Avoid
- Choosing HDMI just because it sounds newer or more advanced
- Assuming optical is outdated and therefore worse for karaoke
- Ignoring TV audio settings
- Sending the wrong audio format to the karaoke system
- Using TV speakers and karaoke speakers together
- Blaming the microphones when the real issue is the TV audio path
- Judging the connection before testing real singing delay
A good karaoke connection should disappear into the background. If you keep thinking about it during a song, the setup probably still needs work.
Related Reading
- How to Choose the Best Karaoke System for Your Home
- Ultimate YouTube Karaoke Setup Guide
- Karaoke Setup for TV + YouTube + Wireless Microphones
- Common Karaoke Problems and How to Fix Them
- How to Set Mic Volume, Music Volume, Echo, Bass and Treble
- DSP Explained for Home Karaoke
- UHF vs VHF vs 2.4GHz Microphones
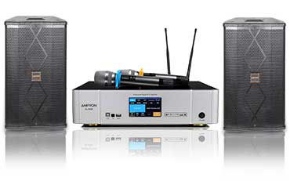
- Ampyon Karaoke Systems Explained
FAQ
Is HDMI better than optical for karaoke?
Not always. HDMI can be better in a well-supported ARC or eARC setup, but optical is often simpler and more predictable for sending TV audio into a karaoke system.
Is optical good enough for YouTube karaoke?
Yes. In many home setups, optical is an excellent choice because karaoke usually needs a clean, stable stereo music feed more than advanced theater-style audio features.
Which connection has less delay for karaoke?
It depends on the full signal chain, especially the TV’s audio processing. The best answer is the one that feels more natural to sing with in your actual setup.
Should I set my TV audio to PCM for karaoke?
In many home karaoke setups, yes. A simple stereo output is often the safest choice when the karaoke system is expecting a straightforward music signal from the TV.
Can I use HDMI for the TV and still connect microphones separately?
Yes, and that is usually the best way to do it. Let the TV send music to the karaoke system, and let the karaoke system handle microphones, vocal effects, and final mixing.
Want a Cleaner TV Karaoke Setup?
If you already know your TV connection options, browse our karaoke packages or continue with Ampyon Karaoke Systems Explained to compare home karaoke systems built for TV integration, YouTube playback, and wireless microphones.