
If your karaoke microphone sounds too low, do not start by turning every volume control up. First confirm whether the voice is truly weak or simply buried by loud music, then check mic distance, mic level, batteries or cables, receiver output, input selection, and vocal balance in that order.
Who this guide is for: Home karaoke users who can hear the music clearly, but the singer sounds weak, distant, buried, thin, or hard to hear through the system.
How this guide was prepared: This guide focuses on one setup problem only: low microphone volume. It follows a practical home troubleshooting order so you can find where vocal level is being lost without creating new problems like feedback, distortion, or harsh sound.
Low microphone volume is frustrating because the karaoke system may seem partly fine. The song plays normally, the lyrics are on screen, and the speakers work, but the voice does not cut through. That usually means the issue is not the whole system. It is somewhere in the vocal path or in the way the voice is balanced against the music.
This is a single-symptom troubleshooting article, not a buying guide and not a full setup guide. If you want the bigger picture behind the full karaoke signal chain, start with the Step-by-Step Home Karaoke Setup Guide.
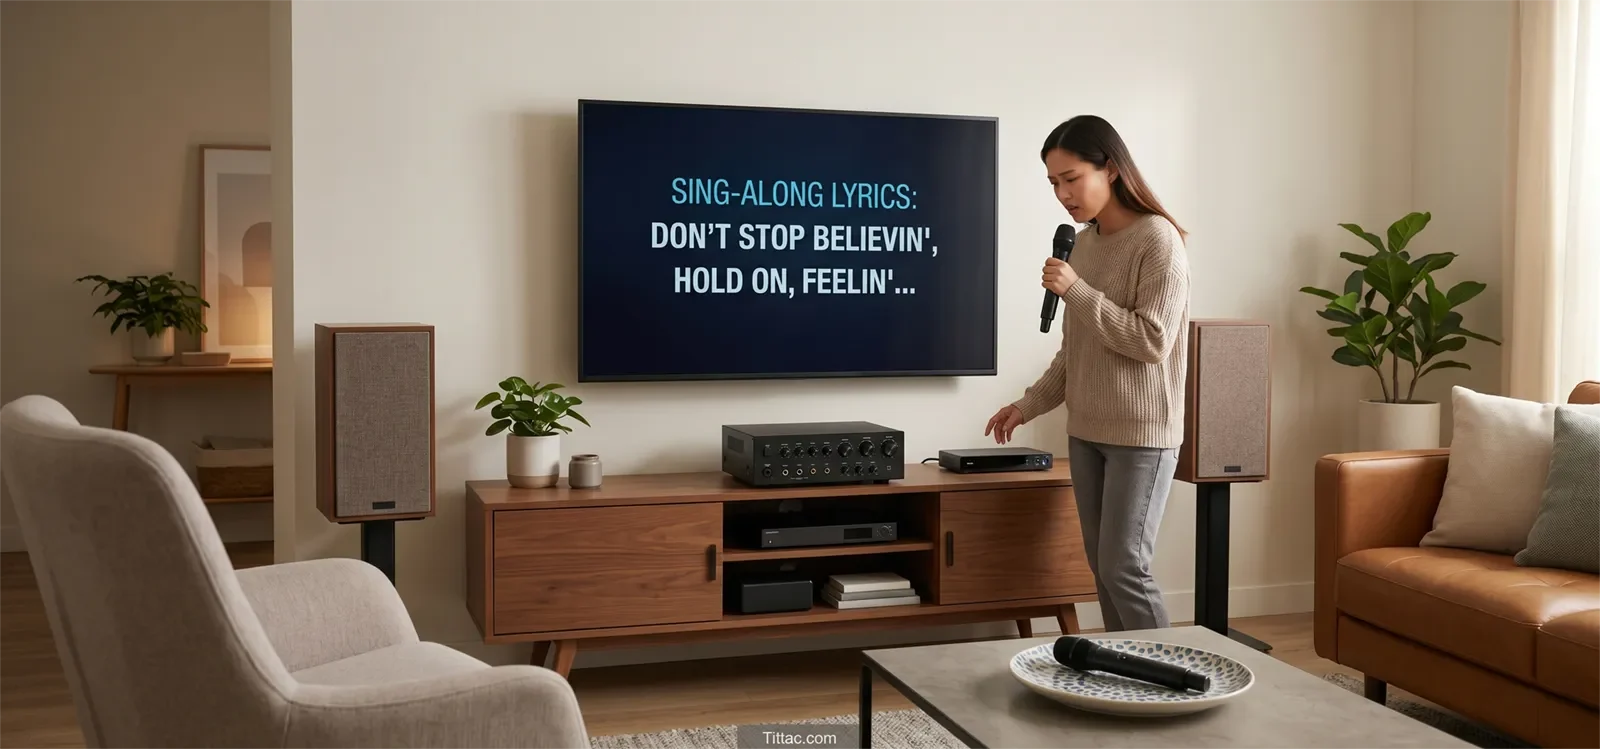
Table of Contents
Quick Answer
To fix low microphone volume in karaoke, first make sure the microphone is not just being buried by loud music or poor mic technique. Then check singing distance, mic level, battery or cable condition, receiver output, input selection, and vocal balance. In most homes, weak vocals improve fastest when you lower the music slightly, simplify the setup, and test one change at a time instead of turning everything up together.
Confirm the Exact Symptom First
Before changing settings, make sure you are solving the right problem. “Low microphone volume” does not always mean the microphone itself is weak. In many home karaoke setups, the vocal is being buried by music, blurred by too much effect, or captured poorly because the singer is holding the mic too far away.
Start with a simple test. Play one familiar song at moderate volume, use one microphone only, and speak or sing into it at a normal karaoke distance.
- If the music sounds normal but the voice feels small, the issue is probably in the microphone path or vocal balance.
- If both music and voice sound weak, the problem may be the overall output path, not the microphone alone.
- If the vocal is audible but unclear, the issue may be mix clarity rather than raw mic volume.
- If raising the mic causes ringing or squealing, feedback risk is already becoming part of the problem.
It also helps to separate “too quiet” from “not clear enough.” A vocal can be loud enough on paper but still feel lost because the track is too loud, the room is reflective, or the direct voice is covered by heavy echo.
Your first job is not to chase more loudness. Your first job is to find whether the voice is weak at the source, weak at the input, or simply not sitting well against the music.
Most Common Causes
Once you confirm that the issue is really low vocal level, a few causes show up again and again in home karaoke systems.
The Singer Is Too Far From the Microphone
If the singer holds the microphone too far away, the system receives less direct voice and more room sound. Turning up levels after that often makes the setup noisier without making the vocal feel stronger.
The Music Is Overpowering the Vocal
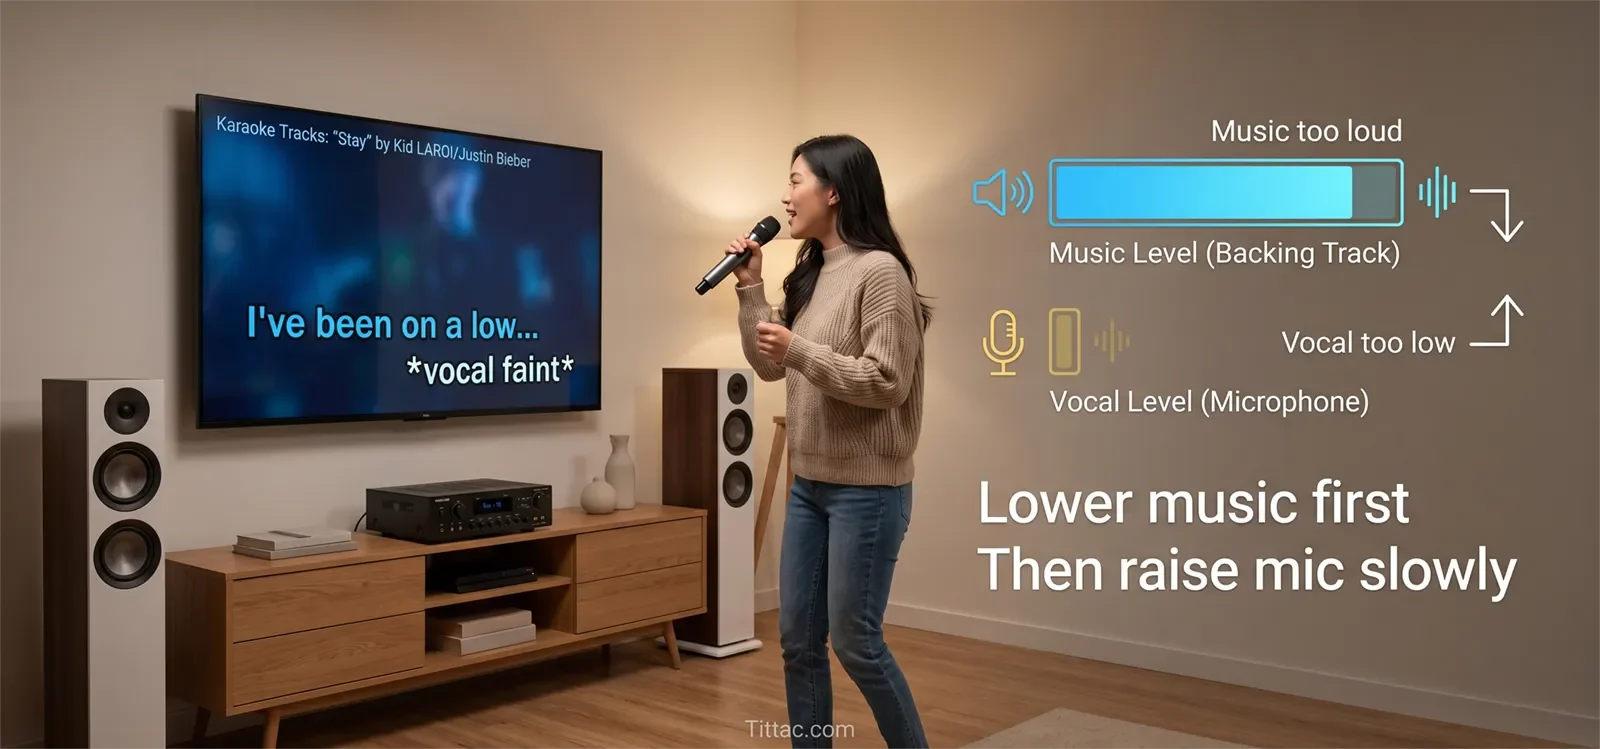
Sometimes the microphone is working normally, but the backing track is simply too loud. The singer seems weak because the music is taking over the mix. Lowering the music slightly is often a cleaner first move than boosting the mic aggressively.
Mic Level and Master Volume Are Being Confused
Raising master volume makes the whole room louder. It does not fix a microphone signal that is entering the system too weakly. If the mic path is low, the mic-side control needs attention before the master output is pushed harder.
Battery, Cable, Receiver, or Input Issues Are Reducing the Signal
A weak wireless battery, loose cable, poorly seated receiver output, or wrong input selection can all make vocals feel smaller than they should. These basic checks are easy to miss when the setup is rushed before guests arrive.
Effects Are Pushing the Voice Back
Too much echo or reverb can make the singer feel farther away even if the microphone is technically working. A voice that needs more presence should not be buried under too much vocal effect.
The Wrong Fix Is Creating a New Problem
If you keep raising the mic side without fixing placement or balance, the next problem may become squeal, ringing, or harshness. If that starts happening, stop and review How to Stop Microphone Feedback before pushing levels further.
The important pattern is this: weak vocals usually come from one lost step in the chain, not from every part failing at once. Controlled troubleshooting works better than random knob-turning.
Step-by-Step Fix Order
The fastest way to fix low microphone volume at home is to simplify the setup and test one variable at a time. This keeps the system stable and helps you hear what actually changed.
1. Use One Source, One Song, and One Microphone
Do not troubleshoot while multiple singers, multiple microphones, and changing tracks are involved. Start with one familiar song at moderate volume and one microphone only.
2. Fix Mic Technique Before Touching Controls
Ask the singer to hold the microphone at a normal karaoke distance and aim it toward the mouth. A microphone that sounds weak because it is too far away will not become clean just because the volume goes up.
3. Lower the Music Slightly
This is one of the most useful home tests. Lowering the music a little tells you whether the microphone is truly weak or simply outmatched by the track. In many systems, this creates a more natural improvement than cranking the vocal channel.
4. Adjust the Mic-Side Controls
Raise the microphone level gradually while speaking or singing normally. Listen for clearer vocal presence, not just more total loudness in the room.
5. Check the Hardware Path
For wired microphones, reseat the cable at both ends and test another cable if possible. For wireless microphones, replace or recharge batteries, confirm the receiver is powered, and make sure the receiver output is connected to the correct input.
6. Swap One Variable at a Time
Try the same microphone on another known-good input. Then try another microphone on the original input. That tells you whether the weakness follows the microphone or stays with the channel.
7. Add Effects Back Lightly
Once the dry vocal is strong enough, add only a small amount of echo or reverb. Too much effect can make the singer feel farther away even when the raw microphone signal is already good.
8. Stop If the Sound Gets Rough Instead of Stronger
If pushing the vocal side makes the room harsher, thinner, or more strained, you may be raising the wrong stage in the chain. At that point, review Why Your Karaoke System Sounds Distorted instead of forcing the controls higher.
This order works because it protects clarity and stability while you troubleshoot. It reduces the chance that you solve a weak vocal by creating a new problem like feedback, distortion, or a tiring mix.
What to Check First
If the microphone sounds too low, use this simple order before making bigger changes:
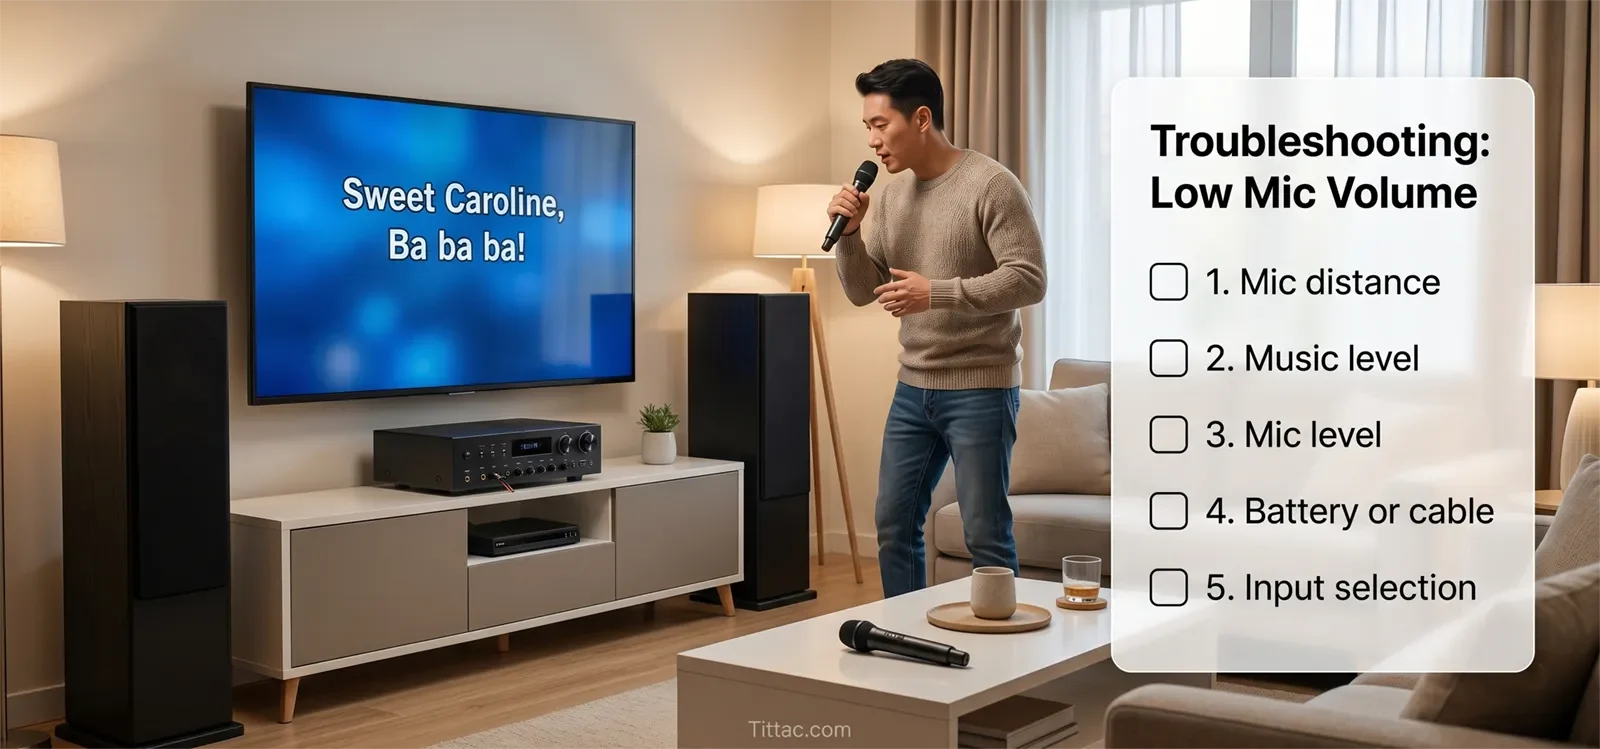
- Mic distance: Is the singer holding the microphone close enough and aiming it correctly?
- Music level: Is the backing track overpowering the singer?
- Mic level: Is the microphone channel actually raised enough?
- Master volume: Are you raising the whole room instead of fixing the vocal path?
- Battery or cable: Is the microphone losing signal strength before it reaches the system?
- Receiver output: Is the wireless receiver connected firmly and set correctly?
- Input selection: Is the karaoke system listening to the right input?
- Effects: Is too much echo or reverb making the voice feel distant?
This checklist keeps the troubleshooting practical. Most home karaoke vocal problems become clearer when you check the simple physical and balance issues before deeper settings.
When the Problem Is Actually Somewhere Else
Not every “quiet mic” complaint is really a quiet mic. Sometimes the microphone is working, but another part of the setup makes the vocal feel small.
One common example is a dominant backing track. If the song is loud, bright, or dense, the voice may seem weak even when the mic channel is healthy. Another example is a reflective room, where hard walls and glass make the direct vocal feel less focused.
The problem can also come from trying to make the room sound bigger. More echo, more bass, and more master volume can feel exciting at first, but they often push the vocal backward instead of bringing it forward. The result is a louder room with less useful vocal clarity.
There are also cases where the microphone itself really is the weak point. If the same microphone sounds thin or underpowered on multiple known-good inputs while another microphone sounds normal on the same setup, the issue may be the mic’s condition, output strength, or overall quality.
The practical takeaway is simple: if the music path works, the room is reasonably stable, and another microphone behaves better in the same chain, stop treating it like a general system problem. The low vocal symptom has already shown you where to focus.
Conclusion
Low microphone volume in karaoke is usually fixable once you isolate where the vocal is being lost. The best order is simple: confirm the symptom, clean up mic technique, lower overpowering music, check the mic-side path, and only then make small level changes.
The right fix gives you clearer vocals without making the setup harsher, less stable, or harder to use next time. Stronger karaoke vocals should feel easier to hear, easier to balance, and less likely to trigger feedback or distortion.
If the setup still feels messy after these checks, the bigger problem may be the overall signal path rather than the microphone alone.
See the Step-by-Step Home Karaoke Setup Guide
Frequently Asked Questions
Why is my karaoke microphone quiet while the music sounds normal?
That usually means the main system output is working, but the vocal signal is weak somewhere in the microphone path. Common reasons include too much distance from the mic, low mic level, weak wireless batteries, a loose cable, wrong input selection, or music overpowering the voice.
Should I raise the mic level first or lower the music first?
For home karaoke, lowering the music slightly is often the cleaner first test. It helps confirm whether the microphone is truly weak or just buried. After that, raise mic level gradually if needed.
Can a weak battery make a wireless mic sound quieter?
Yes. A weak battery does not always cause total dropout right away. Sometimes it first shows up as weak, inconsistent, or underwhelming microphone behavior. Replace or recharge the battery before changing deeper settings.
Why does my mic get louder but still not sound clear?
The issue may be clarity rather than volume. Too much music, poor mic distance, heavy echo, room reflections, or harsh tone settings can make the vocal hard to understand even when the microphone is technically louder.
When should I suspect the microphone itself?
Suspect the microphone after the basic checks are done. If the same mic sounds weak on multiple known-good inputs while another microphone sounds normal on the same setup, the problem may be the microphone’s condition or performance.
Can raising the mic too much cause feedback?
Yes. If the microphone level is pushed too high for the room, speakers, and singer position, feedback can start quickly. Raise mic level gradually and stop if the system begins to ring or squeal.


