
The easiest home karaoke setup is a simple signal path: source to TV, TV audio to the karaoke mixer or karaoke speaker system, microphones into that same karaoke unit, and final sound out through the speakers. Build the system one stage at a time, test music before microphones, and finish with a short sound check for music level, mic level, echo, and feedback.
Who this guide is for: Home users setting up karaoke for casual singing, family nights, or small gatherings who want the system to work without guessing between cables, inputs, microphones, and speaker settings.
How this guide was prepared: This article was rebuilt as Tittac’s main step-by-step home karaoke setup guide. It focuses on signal flow, connection order, first-time testing, and repeatable setup habits, while sending device-specific and troubleshooting questions to their proper guides.
A good home karaoke setup does not start with chasing features. It starts with a signal path that is easy to understand, easy to test, and easy to repeat. Most setup problems happen when the TV, audio device, microphones, and speakers are connected in the wrong order or adjusted before the basic path is confirmed.
The goal is simple: get the karaoke content on the screen, send the music into the karaoke control point, add microphones safely, and play the final mixed sound through the right speakers. Once that flow is clear, the system becomes much easier to use every time.
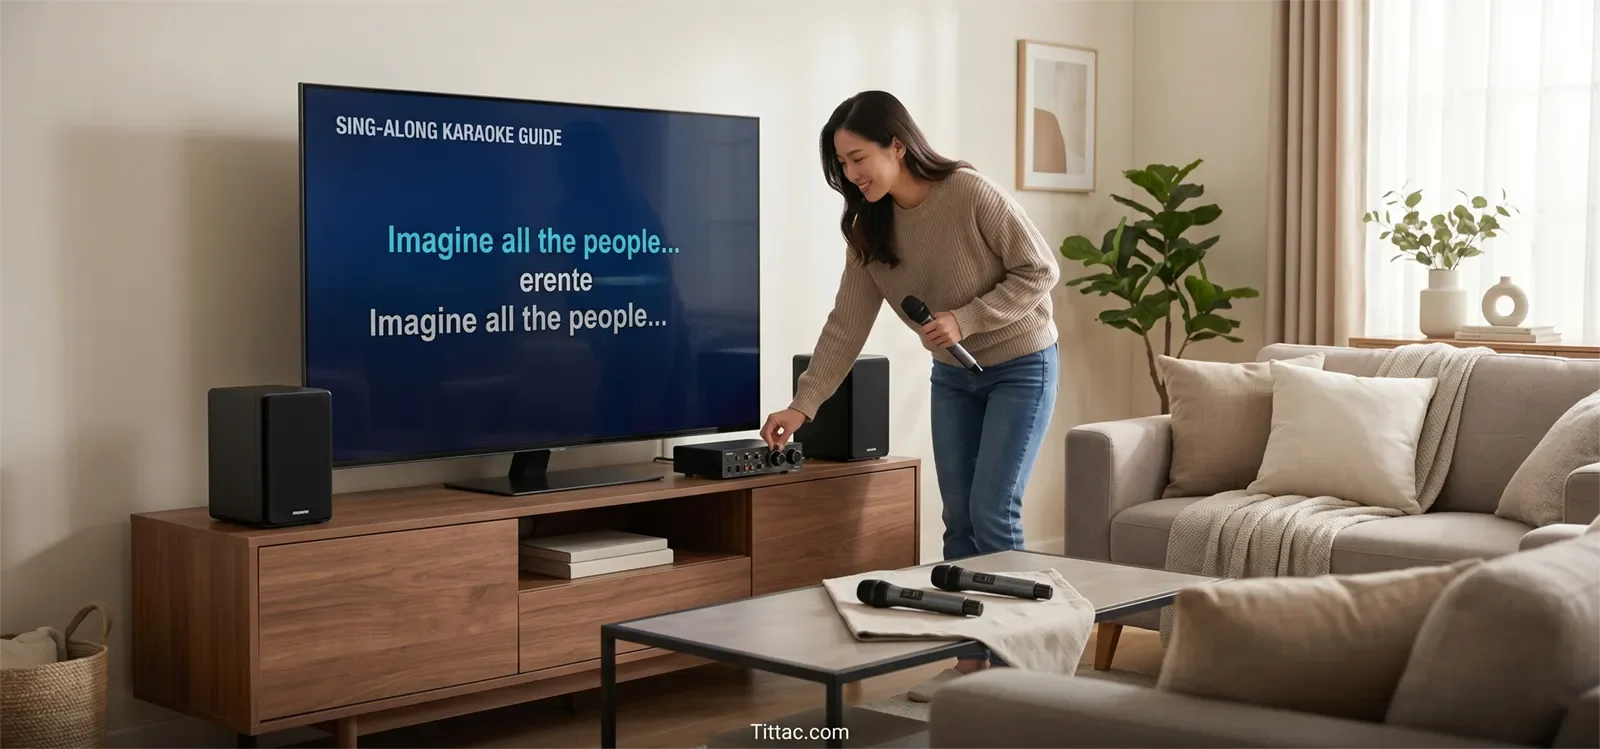
Table of Contents
Quick setup flow for most homes
For most homes, the cleanest karaoke setup follows this order:
- Choose the source: smart TV app, streaming device, phone, tablet, laptop, or karaoke player.
- Send video to the TV: make sure lyrics are easy to see from the singing position.
- Send TV audio to the karaoke system: use the cleanest supported path, such as optical, HDMI ARC, or analog audio.
- Connect microphones to the karaoke unit: not directly to the TV in most home setups.
- Send final sound to the speakers: the karaoke unit should control the music and vocal mix before output.
- Test music first, then microphones: confirm each stage before adding the next one.
This order matters because karaoke is live. If the music path is unclear, microphones are too loud, or speakers are aimed poorly, the system may technically “work” but still feel hard to sing through.
What you need before you start
Before connecting anything, gather every device that will be part of the signal path. A full setup is much easier to build than a half-finished setup where you are still searching for the right cable or guessing which input to use.
Most home karaoke setups need five roles covered:
- Music source: a smart TV app, streaming device, phone, tablet, laptop, or karaoke player.
- Display: usually a TV, so singers can read lyrics comfortably.
- Audio control point: a karaoke mixer, karaoke speaker, karaoke amplifier, or system that combines music and microphone sound.
- Microphones: wired or wireless, with batteries checked before the first test.
- Speaker output: powered speakers, a karaoke speaker, or the main speaker stage of the karaoke system.
You also need the correct cables for your setup and one familiar test song. Keep the first test simple. Do not start with heavy echo, high microphone volume, or every effect turned on. Clean basic sound tells you more than polished sound during setup.
The most important principle is this: music and microphones should usually meet at one main karaoke control point. When TV audio goes one way and microphones are handled somewhere else, the setup becomes harder to balance and harder to troubleshoot.
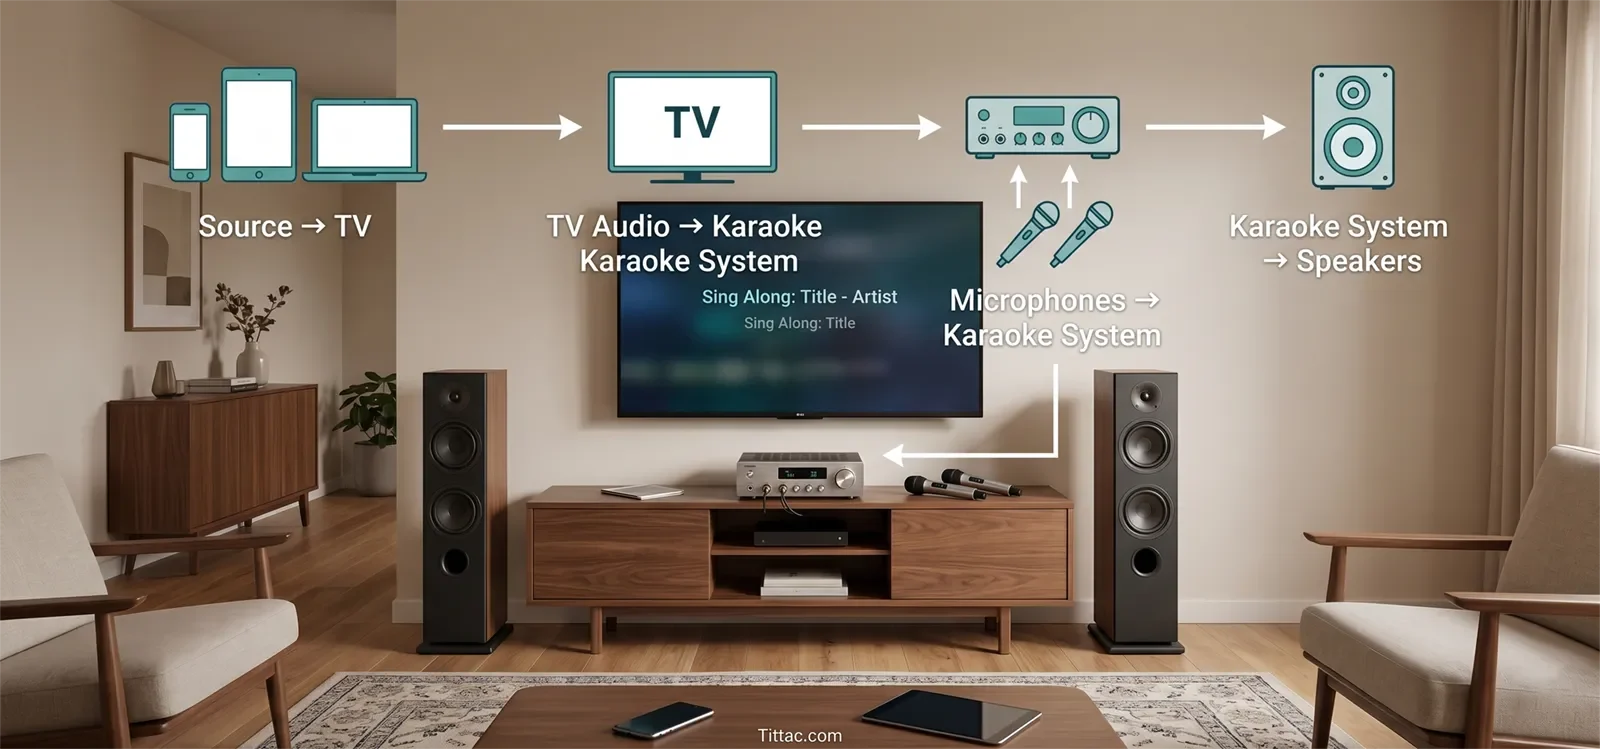
The simplest signal path for most homes
For most home karaoke systems, the best starting point is a straight signal chain with as few handoffs as possible. Fewer layers usually mean fewer wrong-input moments, fewer delay problems, and less confusion when someone else in the house wants to use the system.
The simplest layout is:
- The source sends video and music to the TV.
- The TV sends audio to the karaoke mixer, karaoke speaker, or karaoke amplifier.
- The microphones connect to that same karaoke unit.
- The karaoke unit sends the final mixed sound to the speakers.
This works because it gives each device a clear job. The TV handles lyrics and video. The karaoke system handles music level, microphone level, echo, vocal balance, and the final mix. The speakers play the finished sound into the room.
If your setup is centered around a smart TV, the best device-specific walkthrough is How to Connect a Karaoke System to a Smart TV.
Try not to build two audio paths at the same time. For example, if the TV sends music to one place while the microphones are amplified somewhere else, you may hear sound, but the room will be harder to control. A single understandable path usually wins on stability, feedback control, and everyday use.
How to connect everything in the right order
The safest setup order is display first, music second, speakers third, and microphones last. That lets you confirm each stage before adding the next one.
1. Start with levels low
Before powering up the full system, keep main volume, microphone volume, and effect levels low. This prevents sudden loud sound, feedback, and stressful troubleshooting.
2. Connect the source to the TV
Whether you are using a smart TV app, streaming device, laptop, phone, or karaoke player, confirm that the lyrics or video appear clearly on the TV. If the display side is not stable, do not move on to microphone testing yet.
3. Send TV audio to the karaoke control point
Once the screen is working, connect the TV audio output to the karaoke mixer, karaoke speaker, or amplifier. At this stage, test music only. The first goal is to prove that the song reaches the karaoke unit clearly.
If you are unsure whether HDMI ARC, optical, or another path makes more sense, compare the practical trade-offs in HDMI vs Optical for Karaoke Systems.
4. Confirm the correct input on the karaoke unit
This is one of the most common setup mistakes. The cable can be correct, but the karaoke unit may still be listening to the wrong input. Select the matching input before assuming the cable or TV is the problem.
5. Confirm speaker output
Raise the main music level slowly and confirm that the track plays through the intended speakers. Listen from the main singing or seating position, not only from right next to the equipment.
6. Add one microphone first
Connect or turn on one microphone. Speak normally before singing. Bring up the mic level slowly until the voice sits clearly over the music without sounding strained or causing feedback.
7. Add the second microphone after the first is stable
Once one microphone sounds clean, add the second. A step-by-step approach makes it much easier to hear which part of the setup changed the sound.
If something goes wrong, remove one layer at a time. Confirm the TV shows the content. Confirm music reaches the karaoke unit. Confirm speaker output. Then test microphones. This is faster than changing five settings at once.
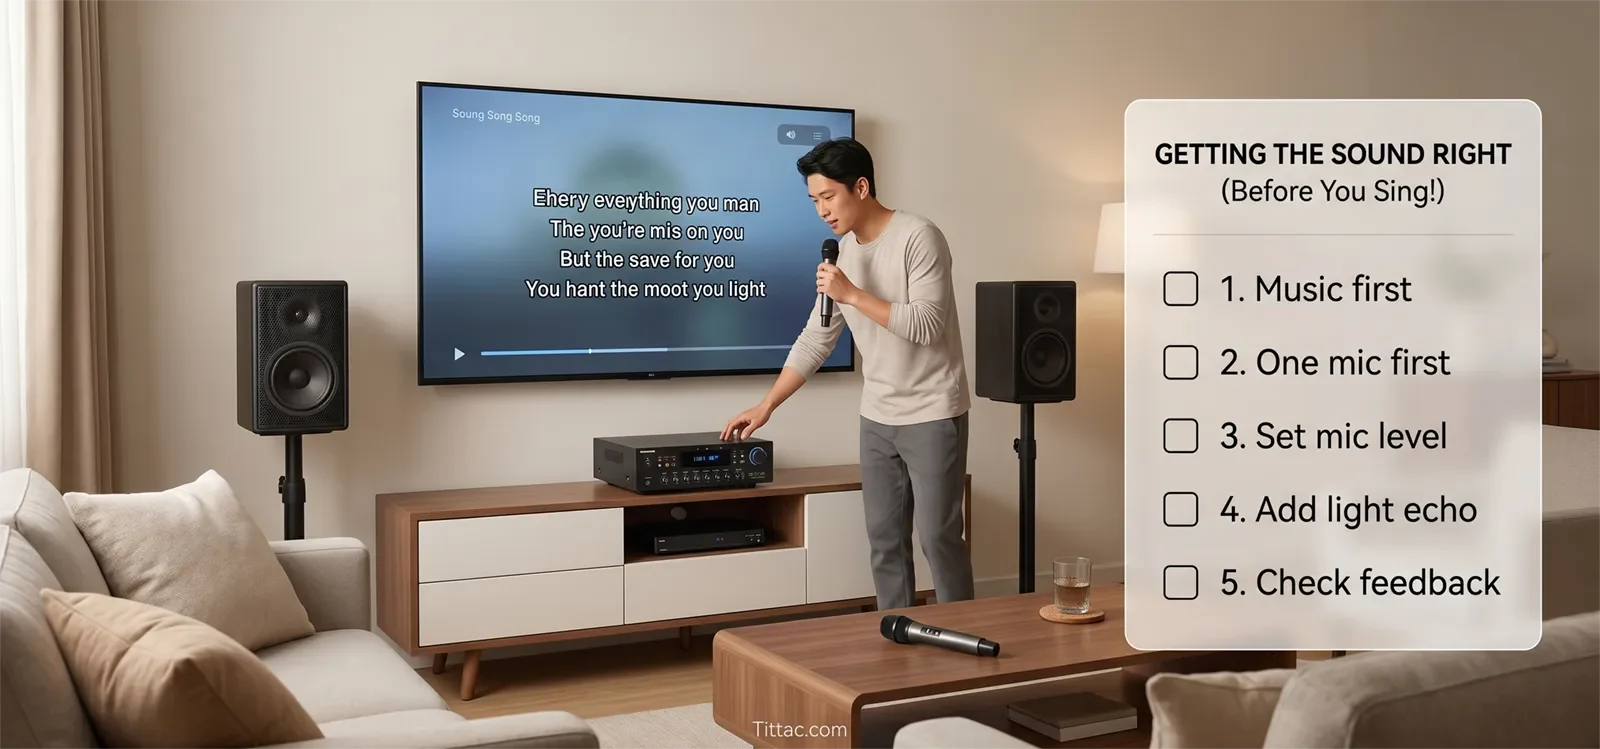
First-time sound check and basic tuning
Your first sound check should be short, safe, and repeatable. The goal is not perfect studio sound. The goal is a home karaoke system that feels clear, comfortable, and easy to sing through.
Set music first
Play one familiar song and bring the music up until it feels full but not overwhelming. If the music sounds thin, harsh, weak, or delayed, fix the music path before increasing microphone volume.
Set microphone level second
Bring up one microphone until speech and light singing sit clearly above the music. Stop before the voice becomes too sharp, too loud, or close to feedback. In most homes, clean vocal balance comes from moderate mic level and good placement, not from turning everything up.
Add echo or reverb lightly
A small amount of echo or reverb can make vocals feel smoother, but too much effect makes words muddy and timing harder to follow. Start light, then add only enough to make the voice feel more natural.
Walk the room once
Listen from the singer position and the guest position. A setup can sound fine near the equipment but feel harsh, weak, or unbalanced where people actually stand or sit. A short walk gives you better information than staring at the control panel.
Fix feedback with placement first
If feedback starts early, adjust placement before making heavy control changes. Keep microphones behind or away from speaker aim, avoid pointing microphones toward speakers, and lower mic level slightly if needed.
If a change makes the sound worse, return to the last clean setting. Good home karaoke tuning is usually small, clear, and easy to reverse.
Reusable home karaoke setup checklist
Use this checklist before each karaoke session, especially if the system is stored away, moved between rooms, or used by different family members.
- Place the TV where singers can read lyrics comfortably.
- Position speakers so they face the room, not directly into microphones.
- Confirm the correct source is selected on the TV.
- Confirm the correct TV audio output is selected.
- Confirm the correct input is selected on the karaoke mixer, speaker, or amplifier.
- Check that every audio cable is fully connected.
- Test one song for music playback before testing microphones.
- Test one microphone before adding a second microphone.
- Start with low levels, then raise music and mic volume gradually.
- Use light vocal effects first and add more only if the room stays clear.
- Save your preferred cable order and level positions for next time.
A repeatable checklist makes even a modest home karaoke system feel easier and more reliable. It also helps prevent the most common problems: wrong input selection, dead mic batteries, loose cables, sudden feedback, and rushed sound checks.
If you are preparing for guests, use Karaoke Setup Checklist Before a Party so you can catch small problems before people arrive.
Frequently Asked Questions
Should TV audio go directly to the speakers or to the karaoke system first?
For most home karaoke setups, TV audio should go to the karaoke system first. That lets the system combine music and microphones before sending the final sound to the speakers. Sending TV sound straight to speakers often makes vocal control harder.
Should microphones connect to the TV?
Usually no. Microphones should connect to the karaoke mixer, karaoke speaker, or amplifier. The TV should handle lyrics and video, while the karaoke system handles vocals, echo, balance, and final output.
What is the safest power-on order for a karaoke system?
Keep all volume levels low, connect the source, TV, karaoke unit, speakers, and microphones, then power on the system calmly. Raise music first, then microphone level. When finished, lower the main volume before powering down.
How much echo should beginners use?
Use less than you think you need at first. Light echo can make vocals feel smoother, but too much echo makes words blurry and timing harder to follow. Start almost dry, add a little, and stop when the voice feels natural.
Can one setup work for casual singing and small parties?
Yes. The same basic wiring can usually work for both. For a party, you may spend more time checking speaker placement, adding a second microphone, and raising levels slightly, but the core signal path should stay the same.
Once your basic system works, the next step is making setup day faster and safer before guests arrive.
Open the Karaoke Setup Checklist Before a Party


