
The easiest way to connect a karaoke system to a smart TV is to let the TV handle the screen and app side, then send the TV audio into the karaoke mixer, karaoke speaker, or amplifier through one clean audio path. For most homes, HDMI ARC, optical, or analog audio can all work, but the TV output setting and the karaoke input setting must match.
Who this guide is for: Home users who want to connect a smart TV to a karaoke system without guessing between cables, TV sound menus, microphone inputs, and speaker outputs.
How this guide was prepared: This article was rebuilt as a setup-focused guide for smart TV karaoke connections. It keeps the focus on signal flow, connection order, input/output settings, and common no-sound mistakes, while sending broader system planning and deeper technical questions to the correct related guides.
A smart TV is usually the easiest screen for home karaoke because it can show lyrics, run apps, and play YouTube or other karaoke content. The part that creates confusion is the audio path. The TV may show the song correctly, but the music may still come from the TV speakers, the wrong audio output, or no output at all.
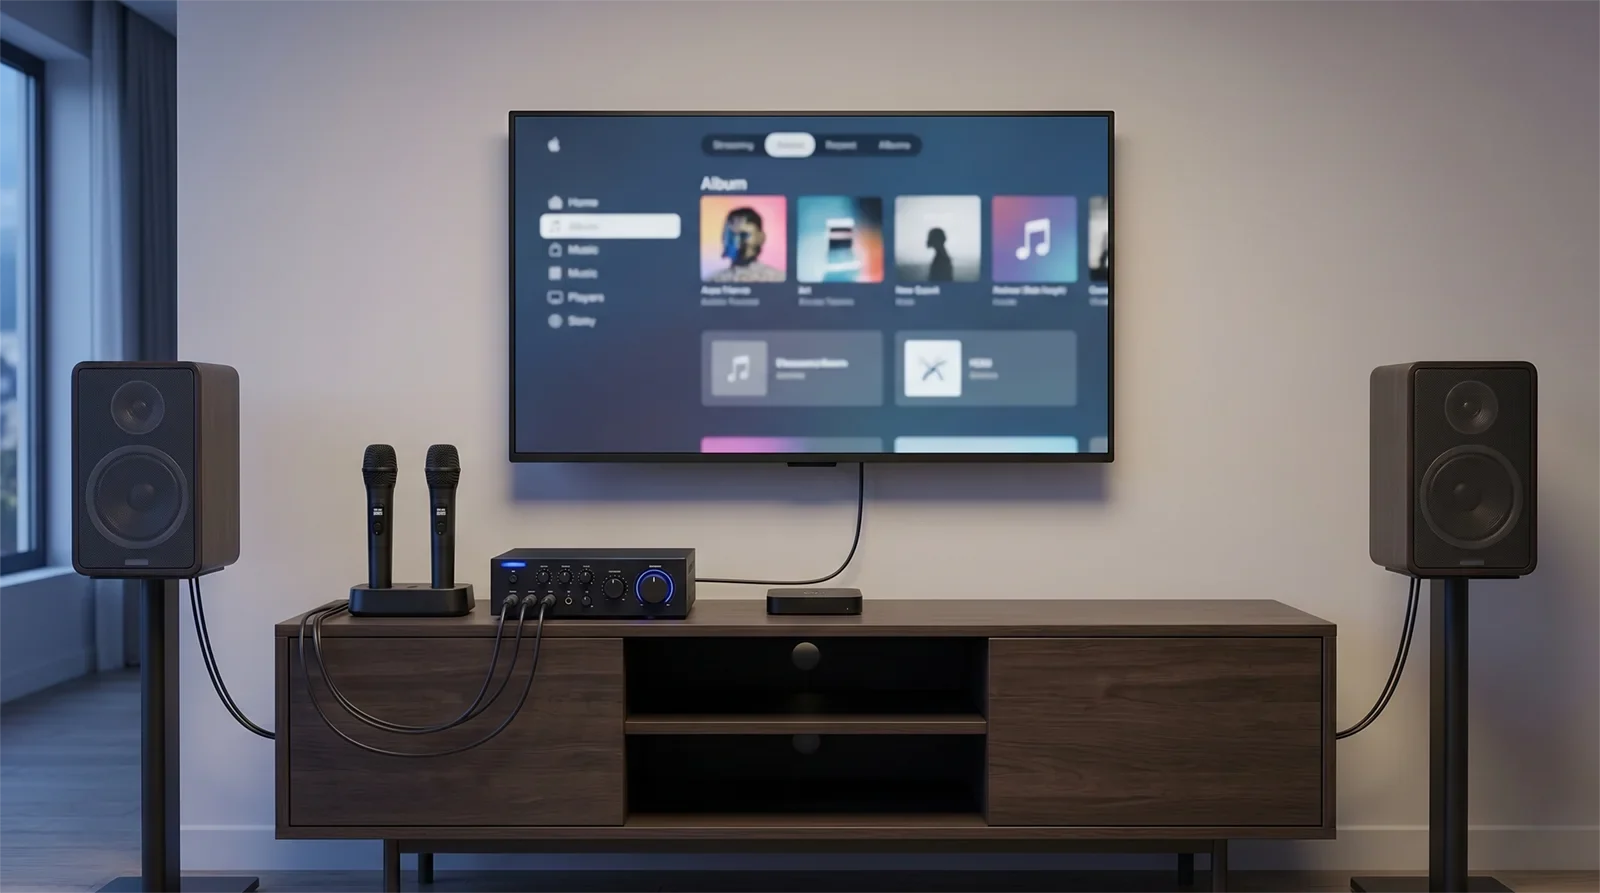
The cleanest setup is simple: the smart TV plays and displays the karaoke content, the TV sends music audio into the karaoke system, the microphones connect to the karaoke system, and the final mixed sound comes from the karaoke speakers. If you want the full room-by-room setup sequence first, start with the Step-by-Step Home Karaoke Setup Guide.
Table of Contents
Best connection path for most homes
For most homes, the best path is: smart TV for video and app playback, TV audio output into the karaoke system, microphones into the karaoke system, and final sound out through the karaoke speakers. This keeps the room easier to control because music, microphones, echo, and volume are handled on the karaoke side instead of being split across several devices.
Each device should have one clear job:
- Smart TV: shows lyrics, runs apps, and plays the karaoke video or music source.
- Karaoke mixer, amplifier, or karaoke speaker: receives TV audio, receives microphones, and controls the final mix.
- Speakers: play the finished sound for the room.
This is why the best setup is usually not “let the TV do everything.” A TV is convenient for the screen, but it is not the best place to control microphone volume, echo, vocal balance, or feedback. Those controls belong on the karaoke system.
The practical rule is simple: choose one audio route from the TV to the karaoke system, select the matching input, and do not split the live singing path across multiple devices. That one rule prevents many common problems, including no sound, delayed sound, and confusion over which volume control actually matters.
If you are deciding between the two most common digital paths, compare the trade-offs in HDMI vs Optical for Karaoke Systems before changing cables at random.
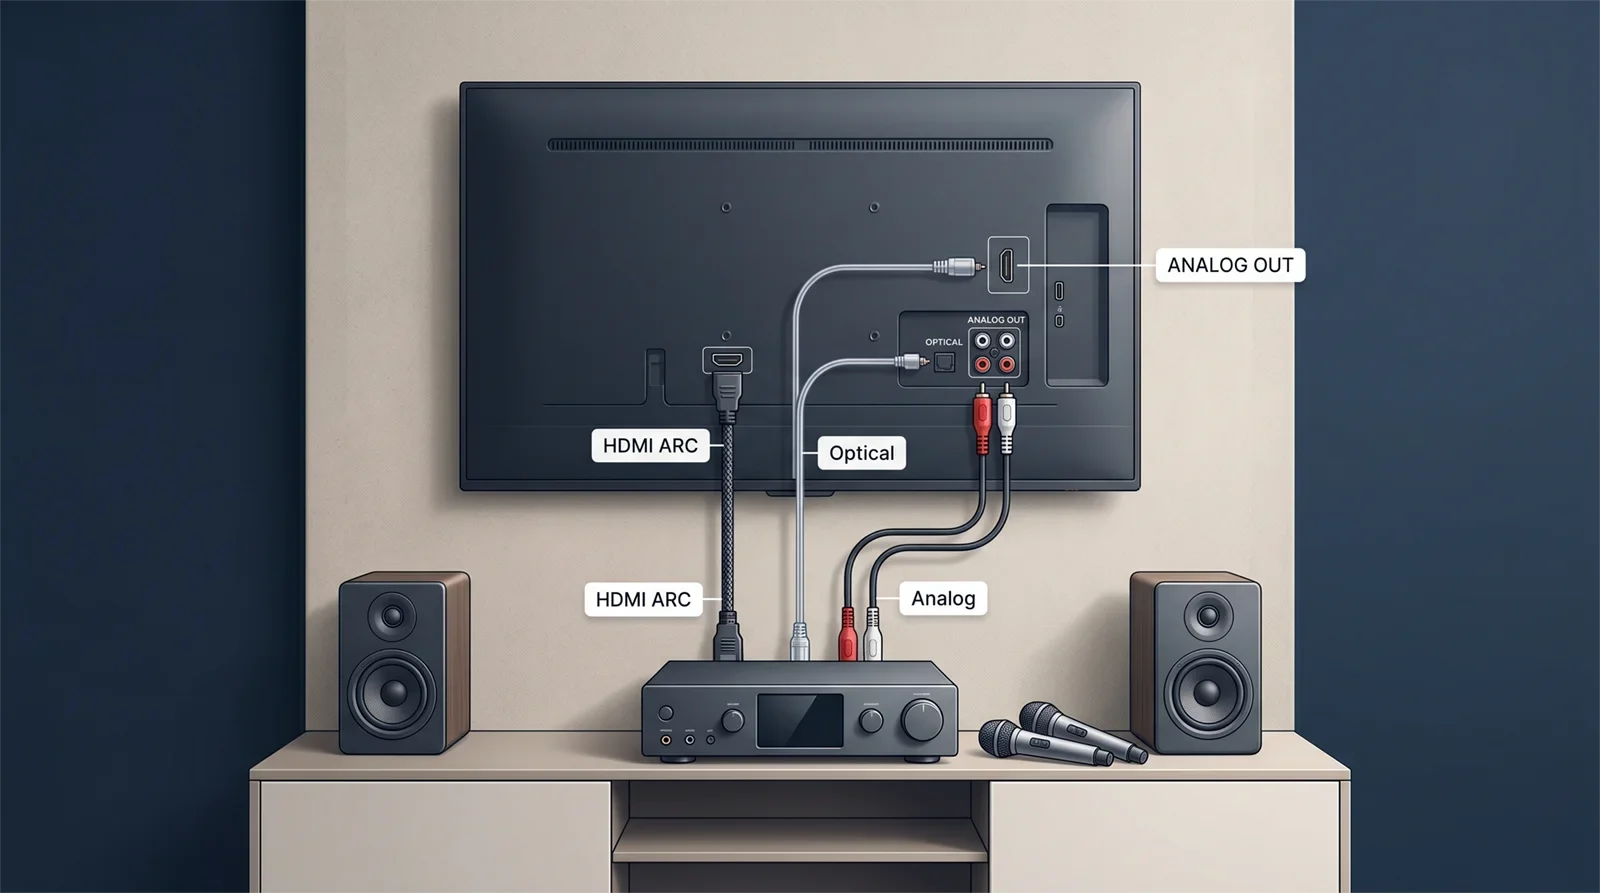
Connection options: HDMI ARC, optical, and analog
There is no single cable that is automatically best for every home karaoke setup. The best option is the one your TV can output clearly and your karaoke system can receive reliably.
HDMI ARC or eARC
HDMI ARC or eARC can work well when both the smart TV and the karaoke-side audio device clearly support ARC or eARC. This route can feel clean in rooms where the TV is already the center of the entertainment system.
The important detail is support. A regular HDMI port is not always an audio return path, and not every karaoke amplifier, mixer, or speaker is designed to receive TV audio through HDMI ARC. If the device does not support it clearly, HDMI can create more menu confusion than benefit.
Optical audio
Optical audio is often one of the most practical ways to send sound from a smart TV into a karaoke system. It gives you a direct digital audio path, is easy to identify on many TVs, and usually keeps the setup simple.
If optical is connected but you hear no sound, check the TV sound output menu. In many cases, the TV must be set to external audio or optical output, and some setups work more reliably when the TV digital audio format is set to PCM.
Analog audio
Analog audio can be the easiest route when the karaoke system expects a simple left/right audio input or auxiliary input. This is common with some karaoke mixers, amplifiers, and portable karaoke speakers.
Analog is not “worse” just because it is simpler. In a home karaoke setup, a stable analog path can be better than a more complicated digital path if it is easier for the family to understand, repeat, and troubleshoot.
When the TV is only the display
Sometimes the smart TV is not the real source. A phone, tablet, streaming box, or laptop may be playing the karaoke content while the TV is only used as a large screen. In that case, decide where the audio should come from: the source device or the TV, not both.
If you often use a phone or tablet for karaoke, compare that workflow with How to Connect Karaoke to a Phone or Tablet. The goal is to keep one consistent setup logic instead of rebuilding the room differently every time.
Step-by-step connection order
The safest way to connect a karaoke system to a smart TV is to build the setup in layers. Do not connect everything at once and then guess where the problem is. Confirm each stage before moving to the next one.
1. Confirm the TV content first
Open the karaoke app, YouTube video, or karaoke source you plan to use. Make sure the lyrics and video display correctly on the smart TV before touching the audio path.
2. Choose one TV audio output
Look at the TV’s actual available audio outputs and choose one route: HDMI ARC/eARC, optical, analog, or another supported output. Do not choose based only on cable shape. The TV must be able to send audio from that output.
3. Connect the TV output to the karaoke system input
Run the selected TV audio output into the matching input on the karaoke mixer, amplifier, or karaoke speaker. At this stage, test music only. Leave microphones off until the music path is working.
4. Select the matching input on the karaoke system
This is one of the most common setup mistakes. The cable may be connected correctly, but the karaoke system may still be listening to another input. Select the exact input you used before assuming the cable or TV has failed.
5. Confirm speaker output from the karaoke side
Once the TV music reaches the karaoke unit, make sure the final sound comes from the correct speakers. If the karaoke system receives sound but the room is still silent, the issue may be after the mixer or amplifier, not at the TV.
6. Add microphones last
After the TV music path is confirmed, connect one microphone and test it at a low level. Then add the second microphone if needed. This prevents microphone volume, echo, or feedback from hiding the real connection problem.
The right order is: screen first, TV audio output second, karaoke input third, speaker output fourth, microphones last. That sequence is slower for the first few minutes but much faster when something does not work.
Settings to check before testing microphones
In many smart TV karaoke setups, the cable is not the real problem. The settings are. A correct cable can still produce no sound if the TV is sending audio somewhere else or the karaoke system is waiting on the wrong input.
Check the TV sound output
Go into the TV sound menu and confirm that audio is being sent through the output you connected. If the TV is still using internal speakers, Bluetooth, or another output mode, the karaoke system may receive nothing.
Check the digital audio format
If you are using optical or another digital output and the system shows a connection but gives no sound, check the TV’s digital audio format. For many karaoke setups, PCM is the safest starting point because it is easier for many audio devices to accept.
Check the karaoke input selection
Make sure the karaoke system is set to the matching input. A mixer, amplifier, or karaoke speaker may have several inputs, but only one may be active at a time.
Check volume in a calm order
- Set the TV playback volume to a normal level.
- Raise the karaoke-side music level gradually.
- Confirm the speakers are producing music.
- Bring up one microphone only after music is working.
- Adjust microphone level and echo slowly.
This order helps you avoid a common mistake: raising every volume control at once, then getting sudden loud sound, feedback, or distortion.
Keep one main audio route
During testing, avoid sending TV audio to multiple destinations. If the TV is connected to Bluetooth speakers, internal speakers, and the karaoke system at the same time, it becomes harder to tell which route is active, delayed, or wrong.
For home karaoke, the best setting is usually the setting that makes the signal path easiest to understand. A clear room is easier to use than a complicated room with too many active routes.
Common mistakes and fix order
When a smart TV karaoke setup does not work, do not start replacing every cable immediately. Most problems come from routing, input selection, or testing the system in the wrong order.
Common mistakes
- Using a TV port that is not actually an audio output.
- Assuming any HDMI port works like HDMI ARC or eARC.
- Connecting optical but not selecting optical or external audio in the TV menu.
- Leaving the karaoke system on the wrong input.
- Testing microphones before confirming that TV music reaches the karaoke system.
- Letting the TV and karaoke system both act as the main audio control point.
- Using extra adapters before proving the basic wired path works.
- Changing several settings at once, then not knowing which change fixed or broke the setup.
Fix order that works faster
- Confirm the smart TV displays the karaoke content correctly.
- Confirm the TV is set to the intended audio output.
- Confirm the cable goes from a real TV output to the matching karaoke input.
- Confirm the karaoke system is set to that input.
- Test music only before using microphones.
- Confirm final speaker output from the karaoke side.
- Add one microphone and test at a low level.
If the picture works but no audio reaches the karaoke system, use No Sound from TV to Karaoke System: Troubleshooting Guide as the next troubleshooting step. That guide focuses on the exact “TV works, sound does not” problem.
The fastest fix is usually simplification. Remove extra adapters, extra audio routes, and extra devices until the TV-to-karaoke path is clear. Once the basic path works, you can add convenience features back one at a time.
Frequently Asked Questions
Can I connect a karaoke system directly to a smart TV?
Yes. If the smart TV has a usable audio output and the karaoke system has a matching input, a direct TV-to-karaoke connection is often the cleanest option. The key is to select the correct TV output and the matching karaoke input.
Why does my TV show lyrics but no sound comes from the karaoke system?
This usually means the video side is working but the audio path is not aligned. The TV may still be using internal speakers, the wrong output may be selected, the digital audio format may not be compatible, or the karaoke system may be on the wrong input.
Should the microphones connect to the smart TV?
For most home karaoke systems, no. Microphones should connect to the karaoke mixer, amplifier, or karaoke speaker. That gives you better control over microphone volume, echo, balance, and feedback.
Is HDMI ARC better than optical for smart TV karaoke?
Not always. HDMI ARC can be convenient when both devices support it clearly, but optical can be simpler and more predictable in many homes. The better option is the one your TV and karaoke system both support cleanly.
What should I test first: music or microphones?
Test music first. Confirm that TV audio reaches the karaoke system and plays through the speakers. Add microphones only after the music path is working. This makes troubleshooting much easier.
Once your smart TV audio path is working, the next step is keeping the full setup easy to repeat every time your family wants to sing.


