Search

English
RSS

Blog posts of '2017' 'August'

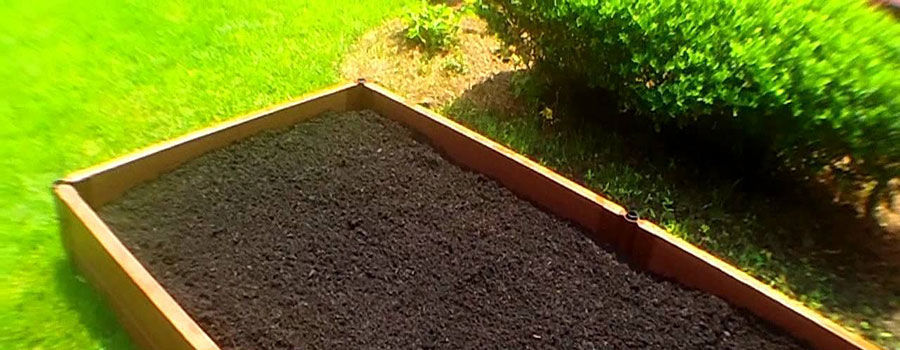
Hоw to mix ѕоіl fоr rаіѕеd bеdѕ
(0) Hоw to mix ѕоіl fоr rаіѕеd bеdѕ

Raised bed gardening is the most convenient way to garden your favorite vegetables and plants in small space. It is best suited for the people who love to have their kitchen garden but feel trouble in bending, stooping and kneeling. The significant advantage of this method extends in fact; you can adjust the size and height of the raised bed according to your ease and comfort. In comparison to the row cropping method, raised beds efficiently delivers four times the amount of produce that too with the minimum efforts.

As a gardener, we all love to see the early season growth and distinctly, this is possible with the help of the raised bed gardening method. You can quickly decide on the size of the beds and cover them beautifully with the rock, wooden or metal frames, but the primary step resides in filling your fabulous creation with the right soil. It is true, raised beds can do wonders, but only when you have the right soil mixture prepared in them. Notably, soil mixing is a crucial step that lays the strong foundation for healthy plants and vegetables, so make sure not to make any mistake preparing the best-suited soil.

Further, if you plan to grow a variety of plants and vegetables in your kitchen garden, make sure you settle the soil mixture separately for each bed.

To clear all doubts, let's understand the procedure of mixing the soil in detail-

Step 1 | Focus on the growing medium

Be clear with this; add approximately 50 % of your growing medium with the compost to get the best results. Compost, also known as black gold is the rich organic matter that boosts the health and growth of the plants. The primary purpose of adding compost is to provide the perfect platform for microbial growth.

You can go for the two types of compost available:

Animal-Based Compost: It provides the vital nutrients that are required for the healthy growth. Animal compost adds much of organic matter to the soil which in turn improves the overall soil structure, water drainage, and the microbial activity. Please note, not all animal composts are good. For an example dog, cat, and pig manures are not at all usable. You can seek the best results from the compost obtained from worms, fish, livestock and even bats.

Plant-Based Compost: It is the mixture of wood chips, straws, grass clippings, kitchen scraps, leaves, and sometimes the egg shells. Plant-based composts have low to moderate values of Nitrogen-phosphorous-potassium, but their nutrients become quickly available for the plants to flourish the rapid growth.

For the remaining 50 %, you can prefer adding coconut coir which is a natural fiber obtained from the coconut husks. The idea of mixing coconut coir is to make the soil aerated while capturing the best of the moisture and nutrients.
Coconut coir helps in attaining a neutral pH level for the plants which demand non-acidic environment for their growth. Further, if you are planning for the plants like strawberries or blueberries, employ peat or sphagnum that significantly helps in creating an acidic environment fit for them.

Step 2| The Plant Food

Now when you have prepared your soil with mixing the growth medium, it’s time to focus on the other important parameter- the plant food. Adding the below-mentioned products will ensure the best growth for your seedlings to turn them into a mature and nutrient-rich plant.

1. Azomite: It is necessarily the rock dust that has lots of trace elements and minerals needed for the healthy growth.

2. Fish Emulsion Water: The use of this is optional, but it can rapidly boost up the level of potassium, nitrogen, phosphorus along with the trace elements.

3. Worm Castings: Great food and soil-enricher for your plants that provides a better source of nitrogen and aid in attracting more worms to the garden.

4. Mycorrhizal Fungi: Normally, it is already available in the soil, but the external addition helps in creating a strong fungus web that further supports in feeding the roots of the plants.

After getting the soil ready, you can start the plantation process bringing the suitable varieties of plants which you want to grow. While filling the beds, always remember to leave a gap of an inch or two for adding the mulch. The mulch does not need to be added early in the season when the weather remains mild, and you focus on drying the soil, but surely, you will wish to add it later to combat the weeds and summers. Additionally, it also helps to retain the moisture and minimizing the nutrient loss of the soil.

Considerably, preparing the soil for raised beds is easy if you have the right information in hand. It should always be contemplated what crop you are planning to grow in the beds as some require less water with an acidic environment, while the others need more water with a neutral environment. Notably, not all the plants grow with the same soil composition, for excellent results, the soil should be prepared by keeping the separate needs of the plants in mind.

Also, while layering the soil, make sure you do not pat it hard to form an even and tight surface. Plants always prefer to grow and spread in the loose soil that can provide them enough aeration and space with the minimum hindrance. So, try to keep the soil as fluffy as possible and get ready to enjoy the ultimate result of your efforts.

How To Grow Cantaloupe
(0) How To Grow Cantaloupe

Having the chilled slices of the cantaloupe on a hot sunny day; what can be better than this? People all over the world love this amazing fruit and are very much aware of its impressive health benefits. Considering its ability to fix the dehydration problems and the low energy issues, dieticians often recommend to include cantaloupe as the significant element in the diet. Points not over, it has beauty benefits too. Putting a slice of the fruit on the eyelids can cure the red eyes and rubbing the piece on the skin rashes gets relief to the affected area. Isn't it an incredible gift from nature?

If you landed on this article, then you must be having some active taste glands for cantaloupe. We all have eaten this fruit which we probably have taken from the nearest store or the fruit corner, but have you ever wondered to grow it on your own! Yes, you read it right, it is about raising the vines of cantaloupe in the backside garden or the side space near the wall. Considerably, growing cantaloupes is easy once you have the right information in hand.

Well, we know, you must be excited for the further details to give it a try. So, let's be straight and get onto the steps.

  •         Choosing the Right Location

Cantaloupes love summer and grow best with the high temperature, therefore, put the seeds only when the ground temperature is at least 70 degrees. If you are living in the colder region, you can start your seeding process indoors and then transfer them outdoors before they began to grow as big. Make sure the walls do not hinder the growth; for best results you can also let them go vertically with the help of the trellis. They can be grown either in pots, containers or trellis but make sure to consider the material and the variety of the cantaloupes as bigger sizes are usually heavy and can break the support system easily.

  •         The Soil Preparation

Now when you have chosen the location and have decided to control the growth pattern, it's time to prepare the soil. Cantaloupes love to grow in warm temperatures so you will need to amend the soil with organic fertilizer, organic compost, or the aged manure. For best results, add the mentioned to the first 6 inches of the soil.

  •         Planting Process

A gap of 36 inches is recommended with every plant when you grow them in the traditional way. However, if you are planning to make use of the trellis, keep a minimum of 12 inches gap (also known as the square foot gardening).

After the plantation process, mulch down the area to keep the new plants warm. Mulch also prevents weeds from blocking the growth and aids to hold maximum moisture.

  •         Pest Care/Companion Planting

Take note, cantaloupes have some pests of concern.  If not taken with proper care, squash bugs and the squash vine borer may even munch your entire plant to make it dead. You may also see cucumber beetles attacking the plant as it starts growing. The best way to defend your baby plant is by giving it a companion to fight. Notably, Tansy flowers and Nasturtiums both can help you for the purpose. Further, we recommend you to inspect your plants twice in a week with a sharp eye on the vines, flowers, and leaves.

  •         Watering

For watering the plants, always prefer soaker hose or the drip irrigators and avoid the use of sprinklers. Watering is essential to make the plant grow strong but soaking it to the leaves often causes the spread of diseases and fungus. Supply water to your plants in the morning and make sure you keep it till the base only. Notably, morning is the best time suited as you will not need to worry about the excess water at the base as afternoon sun automatically dries up the extra moisture.

To note, do not worry if you see the leaves a little wilt in the sun; it is pretty normal.

  •         Fruit Care

You need to protect the newbie fruit as it develops. Gently put a melon cradle or the piece of cardboard under the fruit to protect it from the pests. This step will also help in promoting the ripening process.

VARIETIES TO CHOOSE FROM

If you are planning to grow your plant in the container, you may need to consider the smaller variety of fruit.  Prefer Minnesota Midget which is comparatively a smaller type that fits easily in the palm.

Other varieties to consider:

Planter’s Jumbo

Hale’s Best Jumbo

Honey Rock

  •         Harvesting/Storage Rules

If you want your cantaloupes as sweet and good, let them grow naturally on their vine. Do not pick them at an early stage as picked melons do to ripen much after. A ready to pick fruit has always its rind changed from green to yellow/tan yellow. Additionally, sniff well before you go to pick them up; if it smells sweet and ripe, it is safe to be picked.
For maximum sweetness, store it for one or two days before eating. Concerning more extended storage, you can even freeze it or can make the preserves.

In essence, growing cantaloupes is not as difficult as it seems. With the right process and the time to time checks, you can quickly grow sweet and watery cantaloupes in your home garden.
Further, we hope that the steps mentioned above have given you enough idea about the overall growth process. So don't wait, show some skills and help others by sharing your experience with the active blogs.

Best Vegetables For Raised Beds
(0) Best Vegetables For Raised Beds

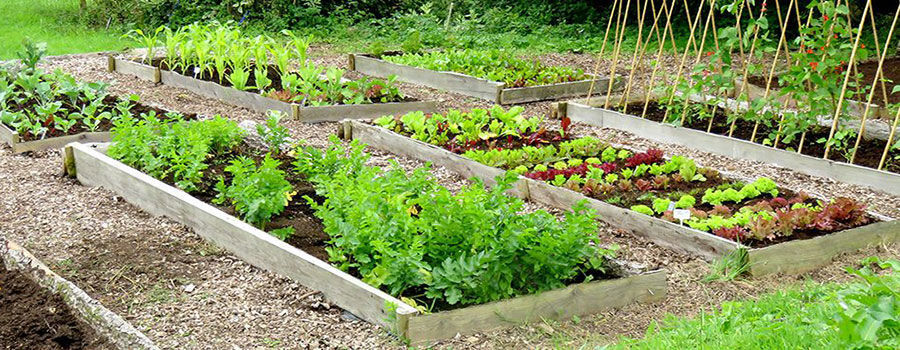
Raised bed gardening is one of the most exceptional ways of gardening that makes it much easier to grow and maintain plants within smaller areas. Usually, for preparing the beds, the soil is raised to approximately six inches above the ground and is walled by the rock, wood or concrete frames/blocks. As the gullies are kept broad, and there is a space planned between the beds, the gardener can easily avoid his/her footsteps from the bed-surface and take care of the plants from a distance.
This method of gardening prevents the soil compaction to the maximum extent and makes it easy for the roots to grow faster in a much free environment.

Raised bed gardening is also renowned for its benefits of preserving moisture, better weed control, and aeration. It majorly helps in controlling the soil erosion and saves many liters of water. Due to its overall advantages and easy to handle subsistence, it is highly in trend these days, and people all over the world love to have their separate raised bed gardens for growing vegetables and plants. Considerably, the central privilege is one can comfortably decide for the height of the bed as per his/her convenience and age.

Markedly, you can grow almost anything with this approach, but few vegetables rise above the rest. These real-stars are best suited for the raised bed gardening and can give you the ultimate results in substantially fewer efforts.

  •         Root Vegetables

Beets, radishes, parsnips, and carrots are perfect for raised beds as they flourish very easily in the loose and rock-free soil. These vegetables mainly require space for their root to grow and love to spread freely without any hindrance. Keep this in mind when you prepare the soil for them, and rest assured you will get the best results.

To emphasize, while it may take several months for the root vegetables to mature, pests can eat and destroy them to the full in merely few weeks. For better growth, try to keep a sharp eye on these enemies and choose the varieties such as 'Paris Market,' 'Little Finger' that evolves pretty fast providing less exposure to the germ attacks.

  •         Leafy Greens

Greens such as spinach, lettuce, and kale grow fabulously in raised beds. As these are the cold weather crops, they need to be planted as soon as you get a trowel into the soil. Notably, the soil in the raised beds warms comparatively more quickly, so for taking several great harvests, plant these crops before the summer hits. Always remember to prepare the bed with quick-draining soil as roots of these plants love to stand dry.

  •         Onions

Onions are the ideal vegetable to be grown in raised beds. Three reasons make onion the perfect crop to grow very easily with minimum effort- they need quick draining soil, they usually take a long time for growth, and they like plenty of organic matter. As the soil of the raised beds can be catered as per the needs, when planning to grow onions, make sure to rich the soil with plenty of compost. From seeds to reach maturity, onions take around 100 days to germinate properly. Therefore, when mapping for the raised bed gardening, you can give the onion bed a head start.

  •         Tomatoes

Being the heavy feeder, tomatoes need nutrient-rich soil for its proper growth. For growing them, you will need to customize your soil putting a lot of compost or organic manure. The overall process is pretty simple, but you need to take proper care when watering the plants. Do not use the water hose to sprinkle around as they may cause a lot of soil based diseases to the leaves. Instead, try to supply water only to the base. Surely it will consume time, but the grown-up plants will be healthy to deliver high-quality tomatoes.

  •         Potatoes

Looking for something that can be grown easily without putting many efforts! Go for potatoes. Comparatively, potatoes take a larger bed to grow correctly, and the recommended size floats around 4*4 ft. with 12 inches of depth. For plantation, you will need to fill the raised bed with mushroom compost, topsoil, and a little quantity of perlite to aid the moisture retention. Once the soil smoothed out, you can create trenches of 4 inches depth keeping a separation distance of around one foot.

After you seed the potatoes, cover them up and water the bed thoroughly to sustain the moisture level. Later when the plant began to grow, make soil hills around the plant covering all but not exactly the leaves. Potatoes love water but make sure not to overfill them as it can even rot down the roots.

In essence, raised bed gardening requires a lot of patience and faith to deliver the expected results, but once you get used to it, it is as simple as any other thing in daily life. Markedly, try to choose the varieties that have short maturity cycle as those who take months to grow, have greater chances to attract the diseases and pests. As a step ahead, read thoroughly for the varieties and prepare the soil best suited for them.

Often people make a mistake while watering the plants. Some of the plants require a high level of moisture while the other needs nearly dry soil to boost their growth. Learn, watering the plants as per their requirement not only helps them to grow as healthy but also keep them away from the diseases and the fungus.

11 Mosquitoes Repellent Plants
(0) 11 Mosquitoes Repellent Plants

Low hygiene lifestyle and poor environmental sanitation are the main causes of mosquito infestation. The best way to prevent any mosquito-borne disease outbreak is to ensure you have a clean environment. Mosquitoes reproduce through stagnant water that can be found anywhere within our homes. The bite can incur skin irritations which includes itching, redness, and swelling of the skin.  

Who has the time to chase mosquitoes around with a spray bottle? Of course, not you! Therefore, you are definitely going to look for a safer way to eradicate mosquitoes in your surroundings. Different mosquito repellents serve different purposes: some kill mosquitoes on contact; others produce scents that suffocate mosquitoes. Insects have the natural habit of staying away from things with scents they despise.

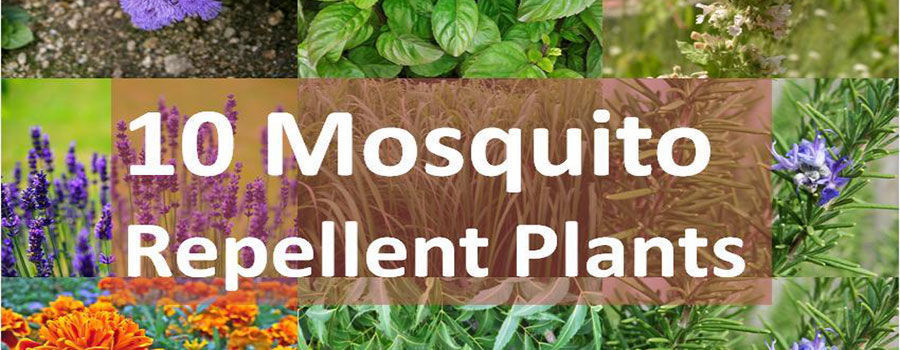
They tend to stay as far as possible when this occurs. Mosquitoes repellent can be made from chemicals, essential oils, and plant derivatives such as marigold, garlic, and mint. Chemicals, as always, have negative impacts on our health and the environment at large. Therefore, growing crops that have mosquito repellant property close to the house will help you ward off your local mosquitoes. These repellent plants will put up an invisible screen in your garden. Some of these mosquito repellent plants are:

  1.      Mint

Mint is very easy to grow and maintain. They grow fast and smell fresh when you rub some leaves on your skin. Mint can also be used in cocktails for celebration with friends and family.

  1.      Geranium

Geranium is a very popular plant. It comes in various colors and can withstand the sun too. Geranium should be planted close to the window or door in order keep mosquitoes from coming in.

  1.      Horsemint

Horsemint is a fast growing plant that is resistant to drought. It can be likened to citronella because of its strong scent that will repel mosquitoes. It can easily grow in dry and sandy areas.

  1.      Catnip

Catnip is also known as a plant for cats; however, this isn’t something you’ll give to your cat as a treat. This plant is very handy in repelling mosquitoes. To most people, catnip is the most potent yet beautiful repellant plant that you can use in the garden.

Since it is easily grown, it doesn’t need much effort to get it growing. Grow catnip in a pot or in the front yard and see the repelling wonders it’ll provide your garden. Consider this plant as it is up to 10 times more effective at repelling mosquitoes than chemical products.

  1.      Lime Basil

The lime basil is a culinary herb. It is a medicinal plant which is very effective as an organic mosquito repellant.

  1.      Marigolds

Marigolds have been used to repel not only mosquitoes, but other insects (including aphids) as well. In fact, mosquitoes do not like the scent of this plant. They are available in many color varieties, including gold, orange, red, and yellow. Since marigolds is attracting, it can be planted on balconies. Other repellent plants can be rubbed on your skin against mosquito; you shouldn’t try that with marigolds.

  1.      Rosemary

Though this herb is used for certain food dishes; yet, it is effective at keeping mosquitoes at bay. This plant can be grown in a pot during the colder climates or in front of your home during the warmer months.

  1.      Garlic

Garlic is a very good mosquito repellent. When ingested, it will eventually find its way into your system, thus keep the mosquitoes at bay. Alternatively, you can plant garlic all around your garden to keep the bugs away during the summer. More so, garlic oil can be sprayed around your yard.

  1.      Citronella

Citronella is another popular mosquito repellent plant which is used in many commercial products for controlling mosquitoes. Because of its oil (citronella oil), this plant is used for many natural mosquito repellents. It can be applied to the skin and can work well just as a candle repellent. Citronella as an environmental-friendly method of getting rid of pests has been proven to have no side effects. When applied to the skin, the scent hides mosquitoes from you.

  1.                         Lemongrass (Cymbopogon flexosus)

Though the fresh scent of lemongrass is good for people; yet, it is annoying for mosquitoes. Lemongrass can be grown from seeds, but it is best to buy fresh lemongrass in the supermarket or shop. Plant them close to the window in a pot with water. Roots will appear within a few weeks and then you can move them to a sunny jar.

  1.                         Lavender

Lavender not only repels mosquito bites, but it also calms and soothes the skin. It can be grown indoor or outdoor. You can also protect your skin by applying the flowers to sensitive parts of the body, such as the arms and ankles.

Mosquitoes are a disturbance which is the reason bug repellant is very important in every household. Using a bug repellent with DEET might seem effective yet, the side effect associated with using it is enormous. As mentioned above, some plants work better when turned into oils that can be applied on the skin, while others burn to make the aroma that repels mosquitoes.

Many of these smells and scents are found in mosquito repellent plants. They are easy to plant and maintain; and they are environmental-friendly. Apart from the plant mosquito repellant, an ideal means of warding away mosquitoes is by keeping the air in motion on the outdoors or in your room. Mosquitoes are not designed to tolerate moving air; therefore, keeping the fan on while on the move would prevent the mosquito bites.


10 Best Evergreen Vines
(0) 10 Best Evergreen Vines

Having perfectly blooming flowers with the bunch of birds singing around, who doesn't want to start the day with such a beautiful aura? A home-garden not only distresses us from the hustles and bustles of our daily life but also brings us closer to nature. People nowadays favor having a green area in their home where they can spend time maintaining the plants and can sit in the lap of scenery. Distinctly, we all love to do hard work to cherish colorful flowers and greenery for tomorrow, but equally, hate it when seasonal plants die with the change of temperatures.

Seeing the garden as pale and the plants becoming dull is the worst feeling for a true gardener. Often people leave their passion for gardening just because they see their seasonal plants getting dull and the overall garden standing as blank. To get the perfect solution for these situations of weather and temperature changes, we have some of the evergreen vines which can add colors to your home or garden area with their amazing growing patterns throughout the year.

Here we have 10 best evergreen vines to make your gardening charm as never-ending and exciting experience.

  1.      Fiveleaf Akebia or Chocolate Vine

Evergreen for the areas with a milder climate, you can plant Fiveleaf Akebia to forget about the blankness-worries in your garden. Featuring bluish-green foliage, it blooms the light fragrant clusters of pink or purple flowers in the mid to the spring. This twining vine loves to face the sun and just in a few days grows up to 30 feet. Since the growth of the chocolate vine is kinda fast, it works excellently for covering the fences, arbors, pergolas or trellises. Moreover, it can also provide you edible seedpods similar to the taste of tapioca pudding, but for that, you will be required to plant more than one vine at a place.

  1.      Bougainvillea

Ideal for covering the windows and the greater area of the side lobbies, bougainvillea easily touches the 20-30 feet mark with its dense spread. It blooms impressive vivid-pink flowers and love to get an extended exposure from the sun. Available in a variety of colors and types, you can also go for the dwarf- forms or the ground cover if you don't want to monster plant. These plants love water till the time they grow well, later they become drought tolerant.

  1.      Rosa Banksiae "Lutea"

Renowned for producing beautiful buttery-yellow flowers, Lutea happily blooms in spring and early summer. As it's not self-supporting, you will require some structure or trellis to provide a gentle support to its slender branches. With the full growth, these dry roses reach to the height of 15-20 feet and spread wide to around of 6-10 feet. Its pale yellow, multi-petalled, 3/4 inch wide double flowers are perfect to give anyone a soul-satisfying peace. Slender branches are thornless which cuddles the rich green foliage of tiny, smooth-edged leave and displays the ultimate beauty of nature.

  1.      Gelsemium Sempervirens or Carolina Yellow Jasmine

Twining vine with trumpet-shaped yellow flowers, Gelsemium Sempervirens love to spread and reach the heights of 20 feet quickly. It blooms well in early spring or later winters with its yellow producing light lemony fragrance. Love to be grown in the gardens or the entrance of the home, this vine also serves the indoor need if given a proper care in pots and hanging baskets.

  1.      Jasminum Polyanthum or Pink Jasmine

Opposite to its name, the flowers on Pink Jasmine are more like white than pink. It blooms well from spring to the midsummers and spread its fragrant flowers to the height of 20 feet. Thrive best in the sun, this plant just grows and grows. Each day you will feel it denser and once mature the subsistence is quite low.

  1.      Clematis Armandii

Prized and praised by the gardeners for its ultimate showy flowers, Clematis Armandii produces 2.5-inch white flowers that bear fragrance in the late spring. Not just the flowers, the dark green leaves of this plant also add a different charm to its overall beauty. It grows well and looks best, but to note, most of its species are toxic.

  1.      Virginia Creeper

If you need shaded three, five or seven leaflets leaves that can cling well to the wall and other surfaces, go for Virginia Creeper. It grows wildly well and can even cover the most of your garden or the front face of your home. This vine produces small greenish flowers in late spring and hard purplish-black berries that attract a lot of birds and bees around.

  1.      Wisteria

This vine loves the sunny environs and grows best in the well-drained but moist soil. It rises as high as 66 feet and prefers to climb the walls, trees, and trellis. Wisteria floribunda and Chinese wisteria are two invasive species of wisteria that are typically famous for home gardens. The beautiful lavender or violet-blue flowers of this lovely vine blooms in mid-late spring. While growing Wisteria is quite easy, but proper care should be given as it slowly covers all the area around.

  1.      Jasminum Nudiflorum

Having none of the characteristic scents from its family, Jasminum Nudiflorum or Winter Jasmine is among the earliest flowering plants that begin to bloom with the start of the New Year. This vine with yellow star-shaped flowers typically spreads around, but if you want to grow it vertically, seek support from the trellis and trim the side shoots to prepare for the more extended base. On an average, it takes the height up to 15 feet.

  1.                         English Ivy

The evergreen perennials English Ivy or Hedera helix are suitable for ground covers, but additionally, they are good climbers too. With their aerial rootlets, they cheerfully climb an average height of 50 feet or more. Though their small greenish flowers are insignificant; they are best known for the beauty of their leaves. As this vine grows extremely fast and dense, you can even think to cover the entire wall area with this natural green-cluster.

Yellow With Jewels
(0) Yellow With Jewels

Which is the most eye-catching neon color? Yellow! The terrific yellow color is found in so many chic handbags, accessories, and fancy dresses. The reason is that it adds up magnificence to your personality. This is the best choice for the boho chic girls who always are in search of cool, funky yet charming nail art designs. Yellow nail art with jewels might sound like an intricate one to recreate or you might feel the need of rushing to a nail art professional, but really there’s no need at all. Just follow the following steps and you’ll be done!

Full Yellow with Jewels Nail Art:

This is a mosaic inspired horizontal nail art, created with jewels. Three bright colors are used to create a colorful impact. A perfect nail art for the fashion forward girls having a striking taste in nail art. The very basic neon color is used as the base; yellow.

STEPS:

  1.       Take the clear base coat to apply it on nails as a protective base.
  2.       Paint two coats of yellow nail polish on your fingernails.
  3.       Once the yellow nail color dries, paint over high shine top coat.
  4.       You’ll need studs for nails to utilize them as jewels. Attach the studs first on the nails vertically in the center of each nail. The arrangement order is up to you. (or you can refer to the picture for it)
  5.       Use a detail brush to paint the studs with the nail colors you would like to. Here, purple, green and pink are used.
  6.       Let the color on studs dry. It’d take longer than usual.
  7.       To secure the yellow nail art with jewels, apply a high shine top coat at the end again.

Colored studs and neon yellow color juxtaposed together; absolutely marvelous look for fingernails. It's a must try!

White Delicate Floral Tips
(0) White Delicate Floral Tips

Getting the same old manicure sounds too boring.  Give yourself a break! Take a day off and make some time from your busy schedule for your nails. You’re about to discover the secret to carry graceful and delicate nails. The secret lies in the step-to-step guide for the white delicate floral nail tips! This lovely floral nail art is for the wedding days, the lunch dates, the family meetings, the formal office meeting and not just that but also for an elegant photo shoot! As a to-be-bride, fantasize the groom putting the wedding ring on your ring finger, and its nail blooming in the floral white tip!

Full White Delicate Floral Tips:

Get your nails a polished fancy look on the day you need to mark your glamor. Without calling in for a professional or spending money at a salon you can make yourself comfortable at home and get your nail tips a charming manicure. You can use pale pink too as the base coat for this manicure.

STEPS:

  1.       Just like a typical french manicure, start your nail art by applying a clear base coat on your nails.
  2.       Now stick crescent-shaped nail guides to your nails for perfect nail tips.
  3.       Paint white nail polish on the nail tips carefully.
  4.       Remove the nail guides patiently, once the nail tips dry out.
  5.       Make two asterisk signs with pink nail color near the tip of the ring fingernail. (refer to the picture)
  6.       Paint five V-shaped petals around the pink asterisk with white nail polish. (refer to the picture)
  7.       Finish off with a top-coat.

What sort of nail art could be more beautiful for a bridesmaid or the bride herself than this delicate one? The unique white nail tips with exquisite flowers bring a bundle of peace and love to you! Love all and spread peace!

Seashells
(0) Seashells

Having a fun day at the beach, taking a sunbath and diving into the waves of the ocean, it’s simply wonderful. In addition to all of this, most of us are in habit of collecting the beautiful seashells too! And not just that, who doesn’t like to sit down in the backyard and do oil painting on the seashells? Just like that, you can do a really cute seashell nail art on your beloved nails! Read on to find out an adsorbs seashell nail art step-to-step guide:

Full Seashell Nail Art:

The color scheme used gives the perfect oceanic vibes; soft and calming, but you can always make changes in it as per your wish. 

STEPS:

  1.       For this one, apply a clear base coat on each fingernail.
  2.       While it dries, grab a sponge and a sky blue and nude nail color.
  3.       Paint a single coat of sky blue nail color on the nails.
  4.       After it dries up, use a small amount of nude nail color with the help of sponge to dab on the ends of the nails such that it appears as a gradient.
  5.       Before it dries, dust the nails with silver glitter and immediately apply a clear base coat on the nails again to solidify the gradient effect. 
  6.       With the help of a striper brush and white nail color draw sea shells of different kinds on each fingernail. (refer to the picture)
  7.       Add an outline to each sea shell design with brown nail color.
  8.       Finish off with a top coat!

If you have to go collect some sea shells, make sure you do your seashell nail art homework a day before. You’ll need a lot of patience to draw the seashells, so don’t be in a rush. With practice, you’ll get better at drawing the cute shells. Have a good time collecting and painting seashells!

Royal Blue With Naked Crescent
(0) Royal Blue With Naked Crescent

How long has it been since the nude nail art trend made its place in the hearts of many? It has been a very long time. Probably since the 1920s till this day the divine naked crescent manicures have been in the hands of many. Can you say it’s an old design? Certainly not. With more and more color upgrades, naked crescent nail designs are getting more modern. Especially, the color blue has been the color of honor and respect. Read on the step below and recreate royal blue nail art with a naked crescent.

Full Royal Blue With Naked Crescent Nail Art:


This is the only nail art design that has always been on the top list since it was introduced. It has never been out of fashion. It’s almost every lady’s favorite negative space nail art design. Other than royal blue, red color or bright orange looks fabulous too.

STEPS:

  1.       Prepare your nails first i.e. apply a protective base coat.
  2.       To create the negative space and make it look like a naked crescent, you’ll require circle shaped stickers (easily available in markets).
  3.       Attach the circle stickers such that they only cover a small area above the nail cuticles creating a half-moon shape.
  4.       Now apply royal blue nail paint on all your nails. Wait until it dries and then paint over a second coat.
  5.       Once the second coat has dried completely, take off the circle stickers.
  6.       With the help of detail nail art brush and same nail paint, draw a line (like that of the semi-circle) between the painted area and naked crescent. (refer to the picture)
  7.       Do apply a high shine top coat at the very end.

These naked nail arts have been a part of the catwalks for a very long time. They have become a trademark now. It’s a lovely vintage-classic nail art! Ready to make a naked half moon on your nails?

Rose Gold Chrome
(0) Rose Gold Chrome

Rose Gold is the new white in wedding themes this day. Stating that it’s the newest sensation is the nail art designs is also correct. People are bored of intricate designs too. It’s time to explore other trending nail art designs like that of ‘rose gold chrome’. Nowadays, the chrome powder is bought as an additive with the nail kits. Check out the steps below for gold-leaf resembling rose gold chrome nail art:

Full Rose Gold Chrome Nail Art:

It is simple yet ultra femme and little edgy. There’s not much to do in it. You only need the right set of materials and a pinch of patience while you do it and that’s it.

STEPS:

  1.       Even if it’s a chrome nail art, you’ll still have to apply a protective base coat on your nails.
  2.       To create a rose gold chrome effect, you’ll need a hot pink base nail color.
  3.       Rose red nail color would do. It could be of any shade.
  4.       Paint an even layer of rose red nail polish on your nails. If you think a second coat is required then go ahead.
  5.       Use an eyeshadow brush or silicone brush to generously apply chrome dust on your painted nails. Shake off excess chrome powder.
  6.       Paint over a thin layer of high shine top coat onto your nails.
  7.       Wait for a while for to admire the rose gold chrome nails of yours!
  8.       If there’s chrome dust stuck around your nails, it’d come off with soap and water.

Rose gold chrome is one of the most wanted nail art looks because of its elegant reflective and metallic finish. Also, it is the only girlish color left after baby pink. Whether it's your friend’s summer wedding or a lunch at grandma’s, you can inspire every eye in the room with your rose-gold chrome nails. Be the trendsetter!