
The cleanest way to connect karaoke to a home theater receiver is usually to let the receiver handle final room playback while a karaoke mixer, karaoke speaker, or karaoke control device handles the microphones before the sound reaches the receiver. Most problems happen when the receiver, TV, and karaoke device all try to control the same audio path at once.
Written by Toan Ho — Tittac editorial team.
Who this guide is for: Home users who already have a home theater receiver and want to add karaoke without creating confusing inputs, microphone control problems, delay, feedback, or a setup that is hard to repeat.
How this guide was prepared: This guide was refreshed around common living-room karaoke setups that use TVs, home theater receivers, karaoke mixers, wireless microphones, source devices, and existing room speakers.
A home theater receiver can be useful in a karaoke setup, especially if you already like how your living room speakers sound. But karaoke is different from watching movies or listening to music. Karaoke adds live microphones, vocal balance, echo, feedback risk, and a stronger need for simple control.
That is why the goal is not to make the receiver do every job. The goal is to give each device one clear role. If you want the broader setup framework first, start with the Step-by-Step Home Karaoke Setup Guide.
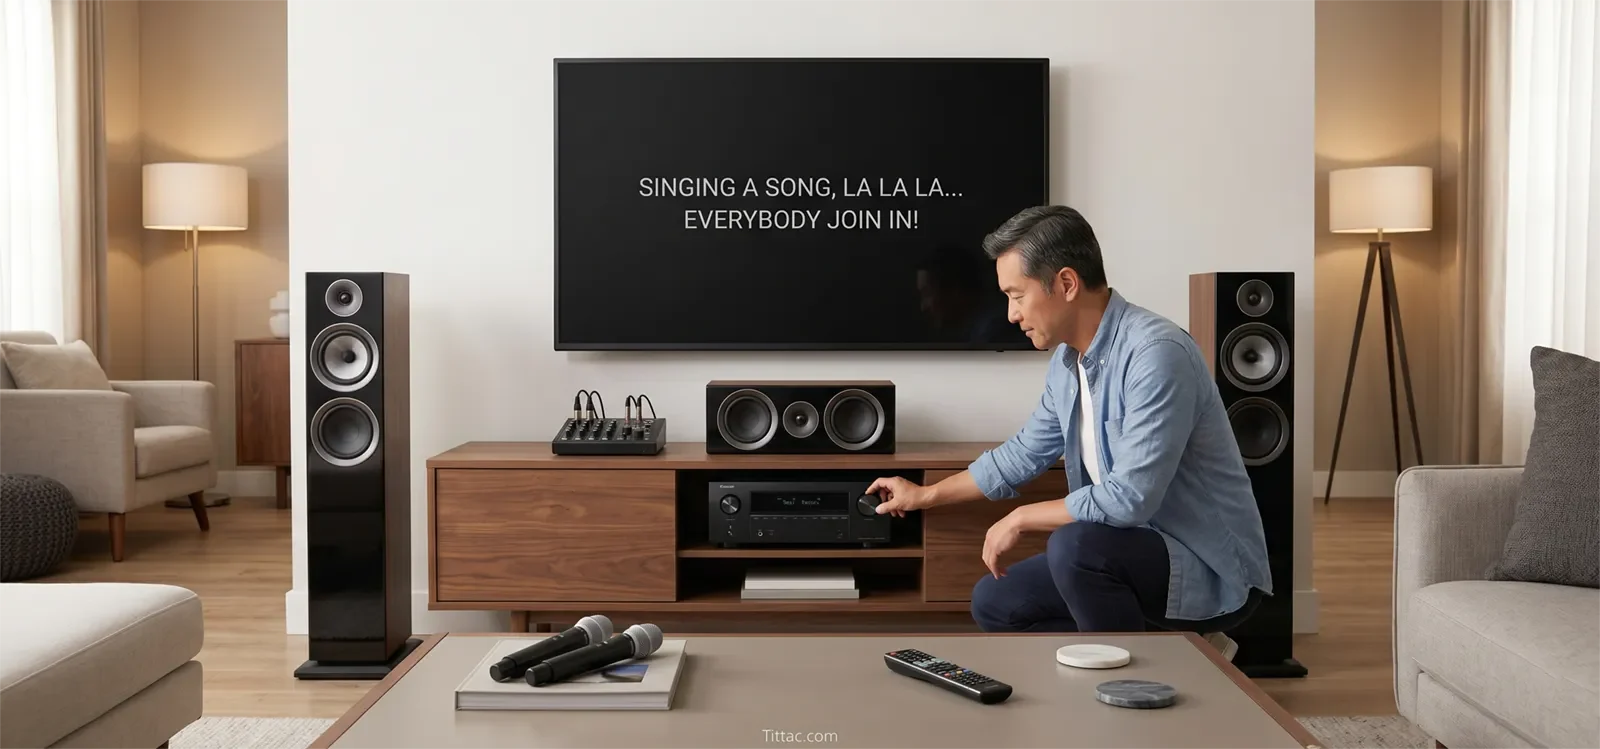
Table of Contents
Quick Answer
For most homes, connect karaoke to a home theater receiver by using a karaoke control point first, then sending the mixed karaoke audio into the receiver for final room playback. The karaoke control point can be a karaoke mixer, karaoke speaker with output, or karaoke amplifier/mixer stage that handles microphones, music level, echo, and vocal balance before the receiver plays the sound through the room speakers.
The receiver should usually act as the final playback stage, not the main microphone controller. This keeps microphones easier to manage and reduces confusion when switching sources.
Best Connection Path for Most Homes
The best connection path is usually: source device or TV to karaoke control point, microphones to karaoke control point, then karaoke output to the home theater receiver. From there, the receiver plays the final sound through the existing speakers.
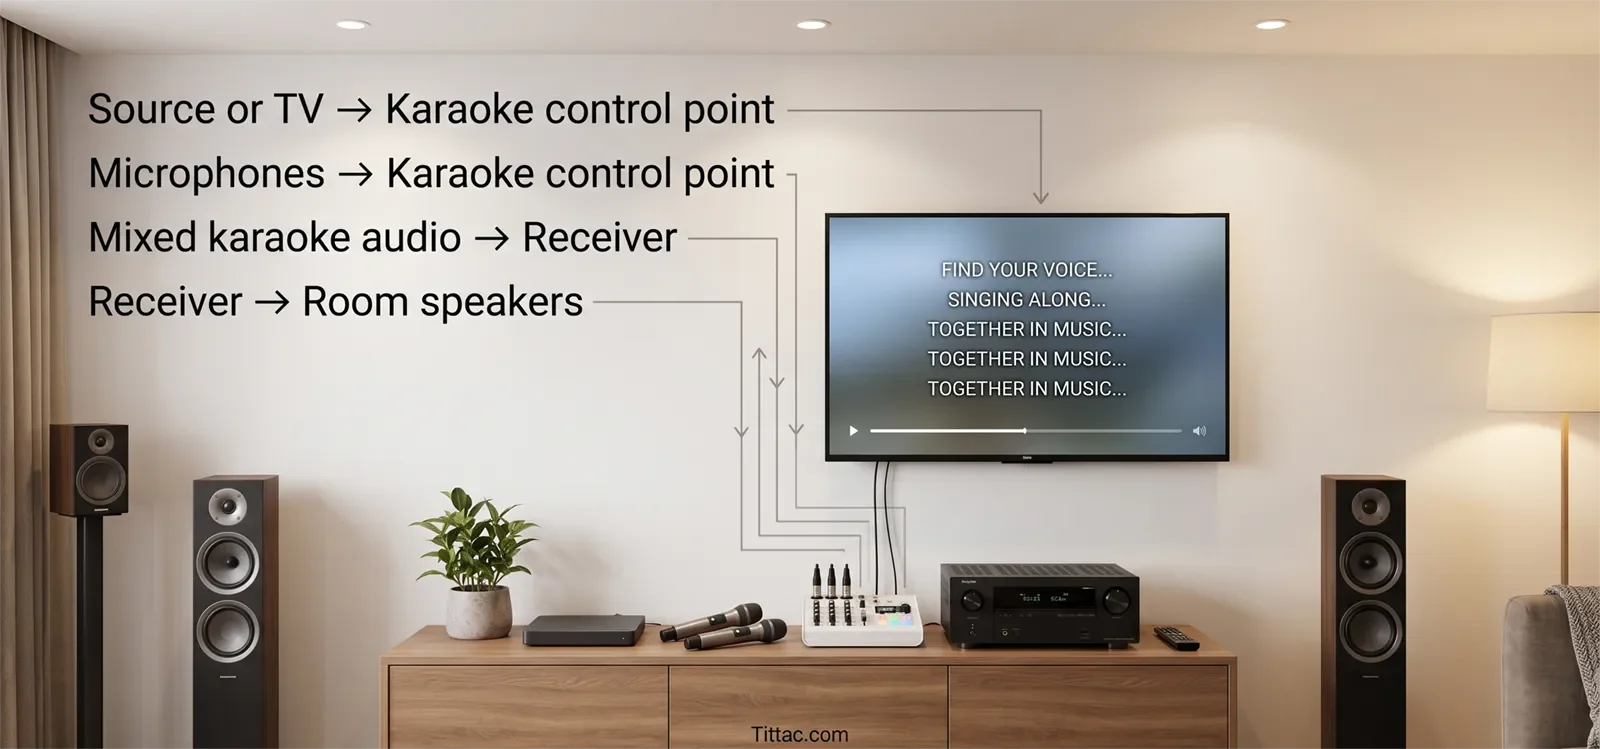
In a clean setup, each device has one clear job:
- Source device or TV: provides karaoke music, video, or lyrics.
- Karaoke control point: handles microphones, music level, echo, and vocal balance.
- Home theater receiver: receives the final karaoke signal and plays it through the room speakers.
This structure works because karaoke needs live vocal control before the sound reaches the room. A receiver is good at switching sources and powering a speaker system, but it is usually not designed to be the main control center for live karaoke microphones.
The simplest rule is this: use the receiver as the room sound engine, not automatically as the full karaoke brain.
Using the Receiver as Final Playback
For many homes, the safest default is to let the receiver handle final playback only. In this layout, the karaoke mixer or karaoke system creates the final music-and-microphone mix first. The receiver simply receives that mixed signal and plays it through the room.
This path makes sense when:
- You already like your home theater speaker setup.
- You want to use the room speakers you already own.
- You need clearer microphone control than the receiver alone provides.
- You want one repeatable karaoke input on the receiver.
This setup also makes troubleshooting easier. If the music works before the receiver but not after, you know the receiver input or playback path needs attention. If the microphone does not work before the receiver, the issue is on the karaoke control side.
When the TV Is Part of the Karaoke Path
Many homes use the TV as the main karaoke screen. That can work well, but the TV path needs to stay clear. The TV may provide the video, the audio, or both. Problems start when the TV, receiver, and karaoke device all try to manage audio at the same time.
If the TV is only showing lyrics, keep audio routed through the karaoke control point. If the TV is also sending audio into the system, make sure that signal goes to the correct karaoke input before it reaches the receiver.
If your main issue is getting TV audio into the karaoke system, read How to Connect a Karaoke System to a Smart TV. If the picture works but sound does not reach the karaoke path, use No Sound from TV to Karaoke System: Troubleshooting Guide.
When a Separate Karaoke Path Is Better
Sometimes the best answer is not to force karaoke through the receiver. If the home theater system is already tuned for movies, if family members want quick singing sessions, or if karaoke gear moves between rooms, a separate karaoke path may be easier.
A separate karaoke speaker or karaoke system can be more practical when:
- The receiver setup requires too many input changes.
- Microphone feedback becomes hard to control through theater speakers.
- Different family members get confused by the receiver menu.
- You want karaoke to start quickly without changing the whole room setup.
That does not mean the receiver is bad. It only means the room may work better when karaoke has its own simple path. If your source changes often between TV, phone, and tablet, compare this with How to Connect Karaoke to a Phone or Tablet.
Step-by-Step Connection Order
Start by confirming the existing home theater system works normally. Before adding karaoke, make sure the receiver, speakers, TV, and normal source devices already play correctly. If the room already has problems, karaoke will make the diagnosis harder.
Next, choose the karaoke control point. This is the device that will receive microphones and control vocal level. For most homes, this should be a karaoke mixer, karaoke speaker, or karaoke system—not the receiver itself.
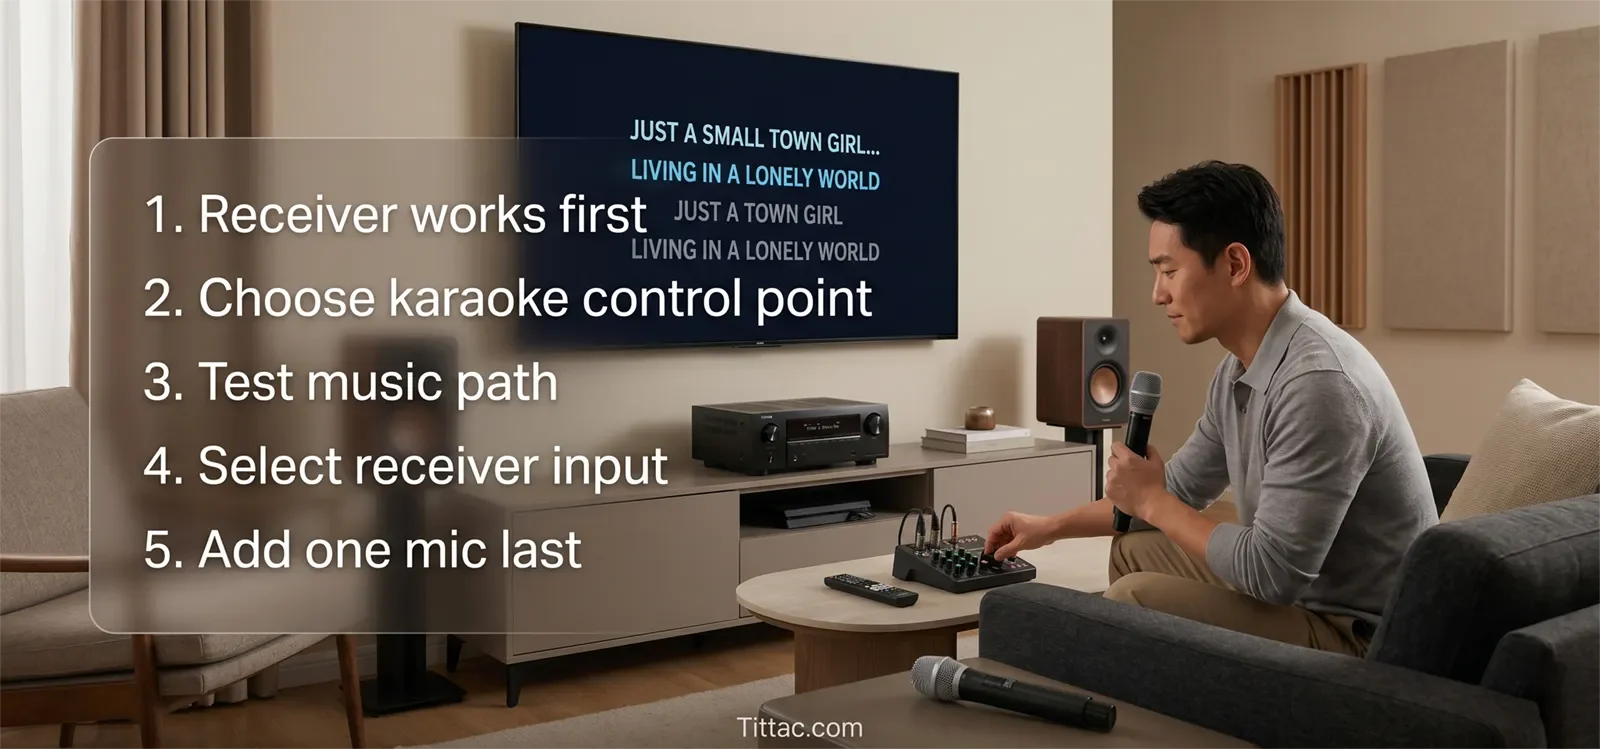
Then route the music source into the karaoke control point. Test music only at first. Do not turn on microphones yet. Confirm that the karaoke track reaches the karaoke device clearly.
After that, send the karaoke control point’s output to the receiver. Select the matching receiver input and test playback through the room speakers. At this stage, the receiver should simply play the final signal.
Once music plays correctly through the receiver, add one microphone. Speak or sing at a normal level and adjust the microphone from the karaoke control point. Do not start with multiple microphones or loud singing until the first mic feels stable.
Finally, add the second microphone or more singers only after the first microphone works cleanly. This staged order keeps the system logical: receiver chain first, karaoke control point second, receiver input third, microphones last.
Settings to Check
Check the receiver input first. Many receiver-based karaoke problems are not wiring failures. The karaoke system may be connected correctly, but the receiver may be listening to the wrong input.
Check that microphone controls actually happen on the karaoke device. If changing mic volume, echo, or vocal tone does not behave as expected, the microphones may not be routed through the right control point.
Set volume in a clean order:
- Set the source device to a normal playback level.
- Set the karaoke music level so the track reaches the control point cleanly.
- Set the receiver to a comfortable room volume.
- Bring up microphone volume last.
This order prevents you from chasing a microphone problem that is really a source-level or receiver-volume problem.
Also check speaker placement. Home theater speakers can fill a room well, but they may point directly toward the singing area. If microphones face the speakers too directly, feedback can happen sooner. If feedback becomes the main issue, read How to Stop Microphone Feedback.
Common Mistakes
The most common mistake is assuming the receiver should control everything. A home theater receiver may be the center of your movie setup, but karaoke usually needs a dedicated microphone control stage before final playback.
Another mistake is testing microphones before the music path works. If music is not reaching the receiver correctly yet, adding microphones only makes the system harder to understand.
People also let the TV, receiver, and karaoke device compete as the main audio manager. This creates delay, wrong-input confusion, and volume controls that no one in the house can remember.
Use this faster fix order:
- Confirm the receiver and speakers work normally without karaoke.
- Confirm the karaoke control point receives music correctly.
- Confirm the karaoke control point feeds the intended receiver input.
- Confirm room playback through the receiver before adding microphones.
- Add one microphone and test live vocal control.
- If the setup becomes confusing, simplify to one source path, one karaoke control point, and one receiver input.
What Not to Do
Do not plug speaker-level outputs into receiver inputs. Use the correct output type from the karaoke device. If you are not sure which output is safe, check the equipment manual or ask for help before connecting it.
Do not use the receiver’s calibration microphone input as a karaoke microphone input. That input is not meant for live singing.
Do not run multiple audio paths at the same time just because the equipment allows it. More paths usually mean more delay, more confusion, and more troubleshooting.
Do not keep a receiver-based karaoke setup if it only works when one person remembers a long list of settings. A good home karaoke setup should be easy enough for the household to repeat.
Conclusion
A home theater receiver can work well in a karaoke setup when it has the right job. Let the karaoke control point handle microphones and vocal balance first, then let the receiver handle final room playback.
If the setup becomes too complicated, the answer may not be more cables or more menu changes. The better answer may be a simpler karaoke path that your household can use confidently every time.
FAQs
Can I connect karaoke to a home theater receiver?
Yes. In many homes, karaoke can connect to a home theater receiver successfully when the receiver is used for final playback and a karaoke device handles microphones before the signal reaches the receiver.
Should microphones plug directly into the receiver?
Usually not. Most home theater receivers are not designed to be the main microphone control point for karaoke. A karaoke mixer, karaoke speaker, or karaoke system is usually better for managing live vocals.
Why does receiver-based karaoke feel confusing?
Because karaoke adds live microphones, echo, vocal balance, and feedback risk. A receiver setup that is simple for movies can become confusing if the karaoke path is not clearly organized.
Can I use my home theater speakers for karaoke?
You can, but be careful with microphone feedback and volume. Theater speakers may fill the room well, but live microphones can become sensitive if speakers point toward the singing area.
When should I stop forcing karaoke through the receiver?
If every karaoke session requires too many input changes, cable swaps, or menu checks, a separate karaoke path may be better. The best setup is the one your household can use without stress.
If you are still deciding whether the receiver should stay in your karaoke chain, compare the real trade-offs before building the whole room around it.


