
The cleanest way to connect multiple wireless microphones for home karaoke is to route every mic receiver into one clear karaoke control point, test one channel at a time, label each microphone path, and send one final mixed output to the speakers. A simple, organized signal path is more important than having every microphone turned on at once.
Who this guide is for: Home karaoke users who want to connect two, three, or four wireless microphones for family singing, parties, or group use without creating a confusing setup.
How this guide was prepared: This guide focuses on the connection side of multi-microphone karaoke. It is not a microphone buying guide. It explains how to organize receivers, inputs, channels, and testing order so the system behaves like one manageable karaoke setup.
Connecting multiple wireless microphones is not just about adding more singers. It is about keeping every microphone signal organized so the room stays clear, stable, and easy to control. A four-mic setup can be fun for family karaoke, but only if each microphone has a clean path and the whole system still feels simple to use.
If you want the broader system view before focusing on the microphone side, start with the Step-by-Step Home Karaoke Setup Guide.
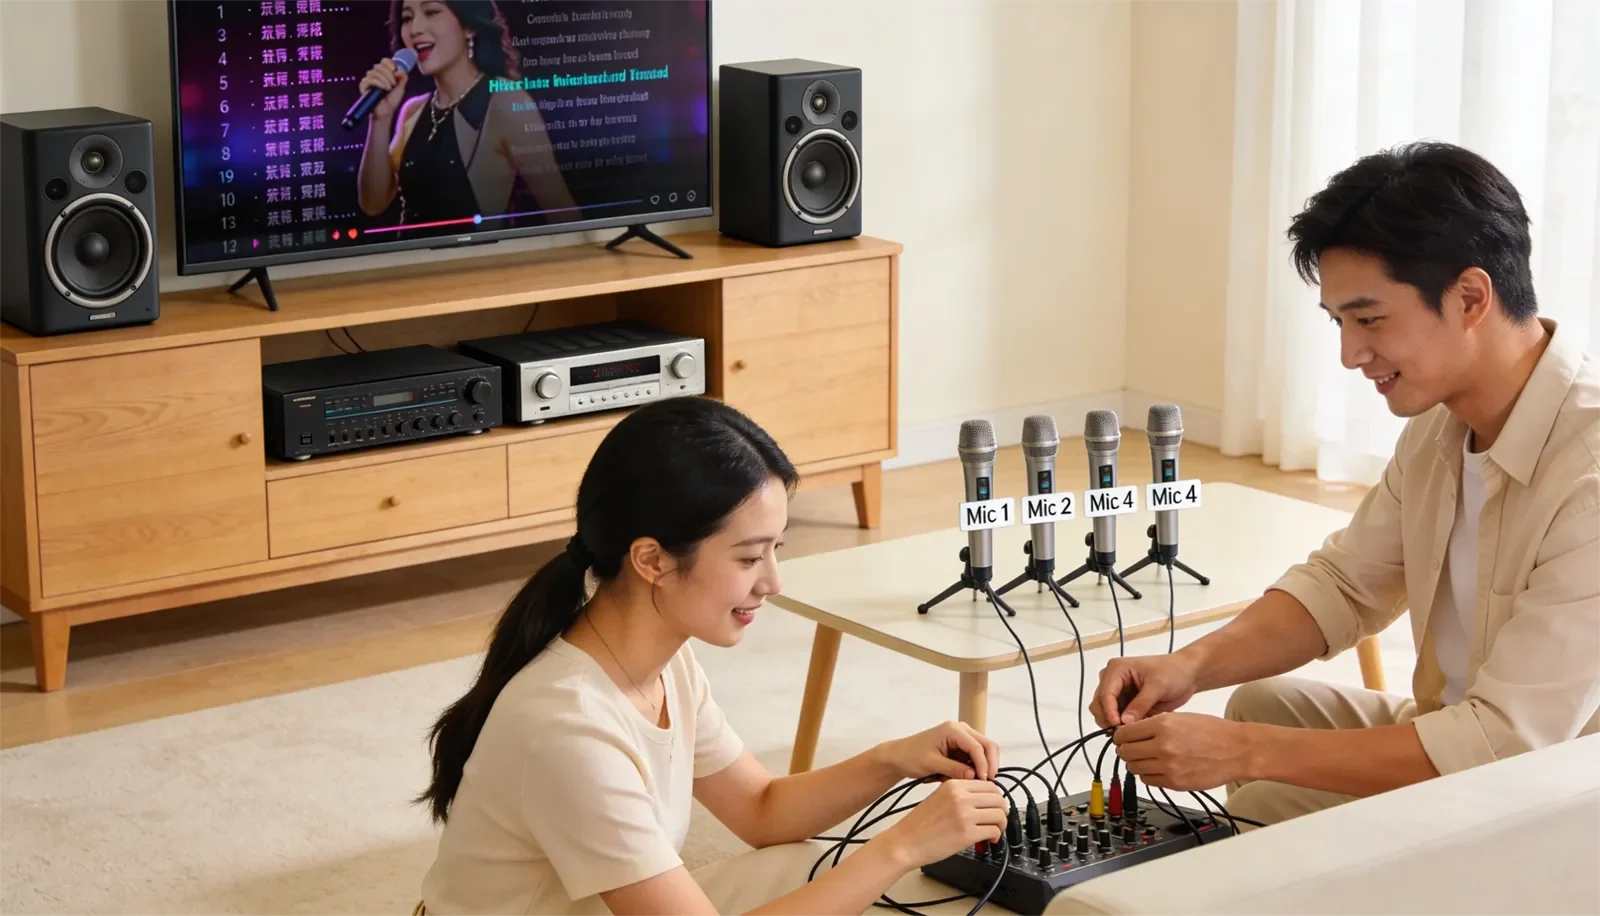
Table of Contents
Quick Answer
For most homes, the best way to connect multiple wireless microphones for karaoke is to route every wireless receiver into one main karaoke mixer, karaoke amplifier, or karaoke speaker that controls all live vocals and music together. Test one microphone at a time, label each mic and receiver channel, keep the final speaker output at the end of the chain, and only keep the microphones live that the room actually needs.
Best Connection Path for Most Homes
For most homes, the best connection path is simple:
Music source + wireless microphone receivers → karaoke control point → speakers.
The music source may be a TV, streaming device, phone, tablet, or karaoke player. The wireless microphone receivers send the mic signals into the karaoke control point. The karaoke system then blends music and microphones together before sending one final mixed output to the speakers.
This structure works because it gives you one place to control the room. Voice level, music level, echo, reverb, and overall output all stay easier to manage when the live microphone signals meet at one main control point.
In a clean multi-mic home setup, each part has a clear role:
- Music source: Provides the song, lyrics, or karaoke track.
- Wireless microphone receivers: Receive the microphone signals and pass them into the system.
- Karaoke control point: Balances music, microphones, effects, and room volume.
- Speakers: Play the final mixed sound into the room.
Problems usually begin when microphone signals take different routes. One microphone goes into one device, another goes somewhere else, and the speakers receive a mix that is hard to understand or adjust. The setup may still make sound, but it becomes harder to troubleshoot when one microphone cuts out, sounds too loud, or causes feedback.
The simplest rule is this: one microphone path, one control point, one final speaker output. In real home karaoke, that structure usually wins on clarity, stability, and daily ease of use.
If you are still deciding what kind of wireless microphone setup is practical for your room, read How to Choose Wireless Microphones for Karaoke before locking in your receiver layout.
Alternative Paths and When They Make Sense
There is more than one workable way to build a multi-wireless-mic setup. The right option depends on how many microphones you actually use at once, how many inputs your karaoke system supports, and whether the room is used for everyday family singing or larger group parties.
Two Microphones Into One Karaoke Unit
This is the easiest home setup. If your karaoke speaker, mixer, or amplifier supports two wireless microphone channels, this layout is usually simple to manage and easy to repeat.
For duets, parents and kids, casual family use, and most home karaoke nights, two well-managed microphones often feel better than four poorly managed microphones.
Three or Four Microphones With One Main Receiver Area
This setup makes sense for family parties, group singing, and homes where more than two people regularly sing together. The key is not only having more microphones. The key is keeping the receiver area organized so each channel is easy to identify, test, lower, or mute.
In a good four-mic setup, the room should still feel like one system—not several separate microphone chains patched together in a hurry.
Two Wireless Sets Used Together
Some homes use two different wireless microphone sets at the same time. That can work, but the routing must stay clear. You need to know which microphone belongs to which receiver, which receiver goes into which input, and where to check first if one channel acts up.
This type of mixed setup only makes sense when the main control point remains clean. Once channel ownership becomes unclear, even a small issue can turn into a long guessing session.
When More Microphones Are Not the Better Setup
A four-mic layout gives more flexibility, but it also adds more channels to manage. If your room usually has one or two active singers, a cleaner two-mic workflow may be easier, clearer, and less feedback-prone.
The main point is not to build the biggest microphone setup your gear can technically allow. The main point is to choose the setup your room can support while still staying understandable in real use.
Step-by-Step Connection Order
The cleanest way to connect multiple wireless microphones is to build the system in layers. Do not turn on every microphone at once and guess which channel belongs where. A staged connection order makes the whole setup easier to test.
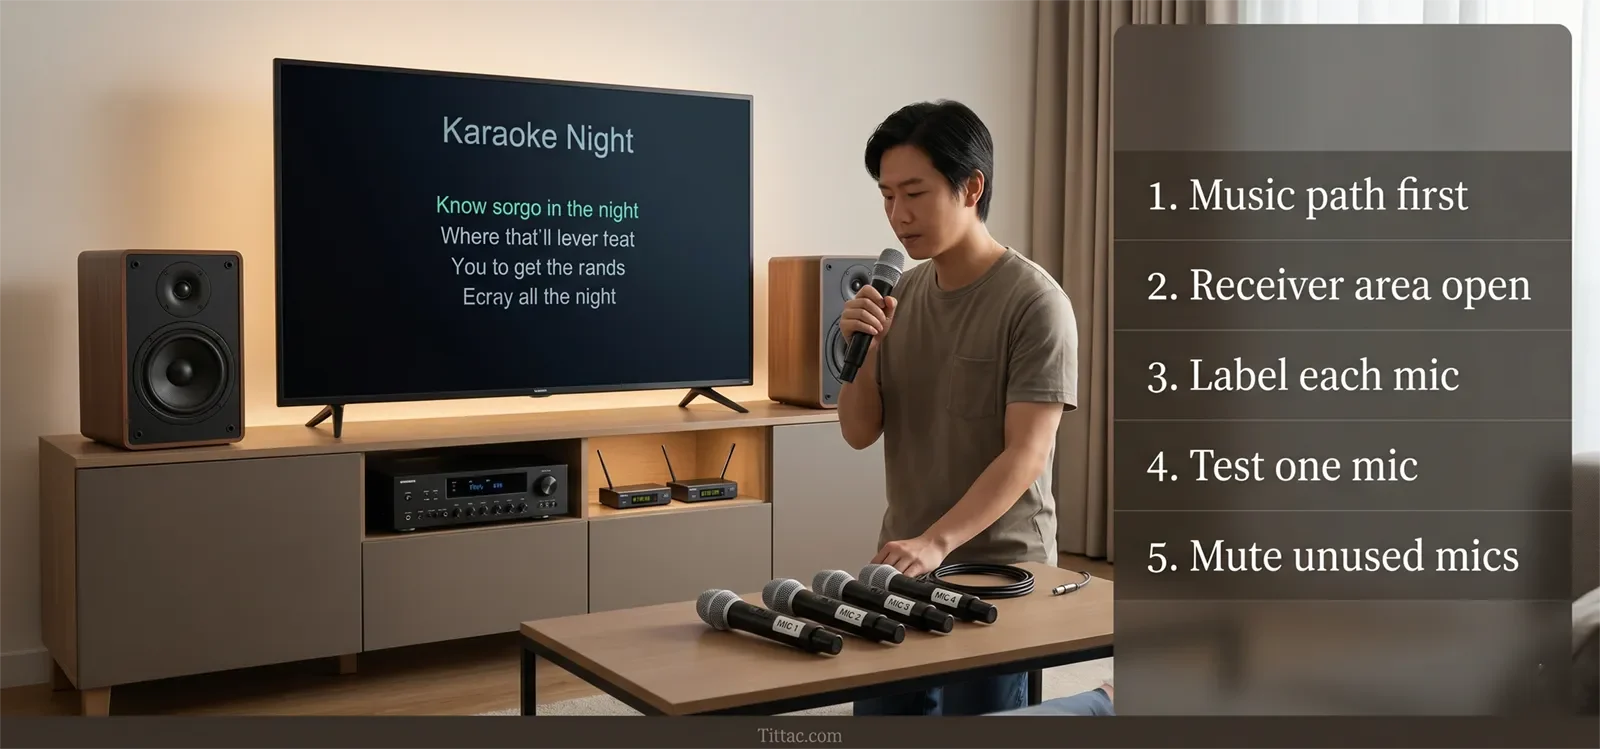
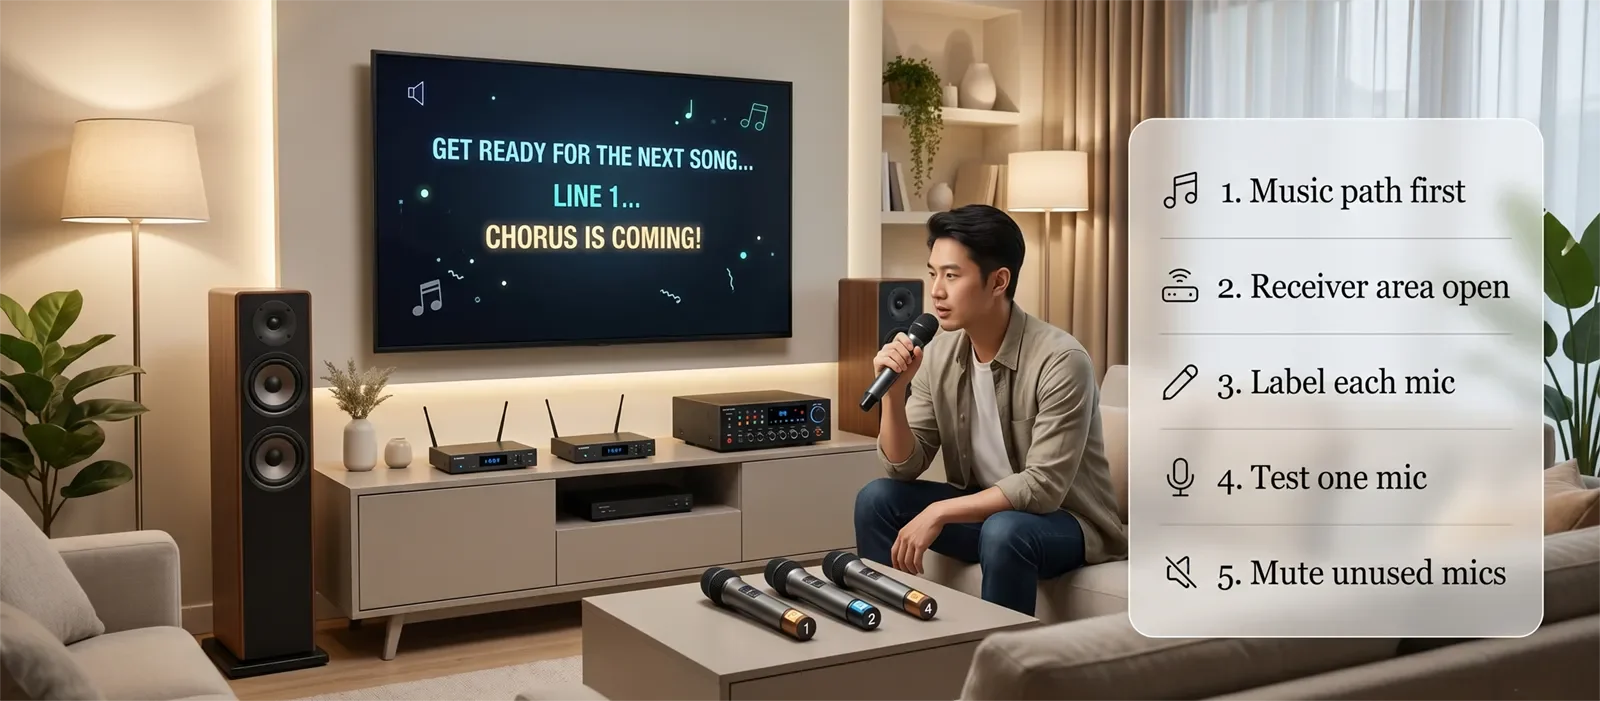
1. Start With the Music Source
Before touching the microphone side, make sure the song source is working through the main speakers. Whether you use a TV, streaming device, phone, tablet, or karaoke player, confirm the music path first.
A stable music path gives you a clean base before live vocals enter the system.
2. Place the Receiver Area in One Organized Location
Place the wireless microphone receivers near the main karaoke device in an open, reachable area. Do not bury them behind the TV, squeeze them deep into a crowded electronics stack, or hide them where channel status and cable routing are hard to see.
A clean receiver area matters more than many people think. In home karaoke, better organization often solves problems before any sound setting is changed.
3. Connect Receiver Outputs to the Karaoke Control Point
Connect each receiver output to the karaoke mixer, karaoke amplifier, karaoke speaker, or main karaoke control device. Keep the route as direct as possible.
The shorter and clearer the path, the easier it is to test later.
4. Label the Microphones and Channels
If you have Mic 1, Mic 2, Mic 3, and Mic 4, label them clearly. Match each microphone to its receiver channel and each receiver channel to the input being used.
This sounds basic, but it saves a lot of time during family karaoke and parties. When one mic stops working or sounds different, you know exactly where to look first.
5. Test One Microphone at a Time
Turn on one microphone and speak into it normally. Confirm that the correct channel responds, the signal reaches the correct input, and the room hears it cleanly.
Then test the second microphone, then the third, then the fourth. This order matters because it lets you isolate problems quickly instead of discovering everything at once.
6. Raise Vocal Levels Gradually
Once each microphone is confirmed, bring up vocal levels slowly. The goal is not maximum loudness. The goal is usable clarity with enough room for multiple voices.
In most homes, a calmer gain structure is easier to manage than pushing every microphone as if it were the only one in the system.
7. Keep the Final Speaker Output Last
The final mixed sound should leave from one main karaoke control point into the speakers. That makes the system easier to manage because music and microphones meet in the same place before entering the room.
This order may feel slower at first, but it usually saves time overall. A reliable karaoke setup is one where the signal path is obvious from source to receiver to karaoke system to speakers.
Settings to Check
Once the wiring is in place, the next step is making sure the room behaves predictably. In many multi-mic setups, the connection path is correct, but the day-to-day settings create confusion.
Check That Each Mic Is Assigned Correctly
Do not assume the microphone in your hand matches the receiver channel you think it does. Confirm it with a quick voice test. This is one of the best habits before a party or family gathering.
Check That the Karaoke System Is Listening to the Right Inputs
Even when the receiver is connected correctly, the karaoke device may still be set to the wrong input or channel structure. Before assuming a microphone is dead, confirm that the karaoke side is ready to receive that signal.
Check Batteries and Power
Weak batteries or inconsistent charging can make one microphone feel less stable than the others. When one channel behaves badly, always check power before blaming the whole system.
Check How Many Microphones Need to Stay Live
A four-mic setup does not mean all four microphones should stay active all night. If only one or two people are singing, keep the extra microphones lower, muted, or turned off. Multi-mic karaoke usually sounds cleaner when the room carries only the voices it really needs.
Check Receiver Placement Before Changing Sound Controls
If one microphone drops out or feels weak, look at receiver placement, signal distance, and channel organization before changing several vocal controls. In many homes, location and testing order matter more than dramatic sound adjustments.
The best settings are usually the ones that make the room calmer, not busier. Multi-mic karaoke works best when you reduce uncertainty instead of adding more variables.
Common Mistakes and Fix Order
Most multi-wireless-mic problems do not come from mysterious hardware failure. They usually come from unclear routing, rushed setup, weak labeling, or too many active microphones before the room is ready.
Common Mistakes
- Turning on every microphone before testing one clean channel.
- Using multiple microphone paths without one clear control point.
- Forgetting which microphone belongs to which receiver channel.
- Raising all mic levels as if every microphone must always be equally active.
- Ignoring batteries, charging, receiver placement, or channel status.
- Trying to solve a connection problem by changing too many sound settings at once.
- Leaving unused microphones live in the room during songs.
Fix Order That Works Faster
- Confirm the music path works through the main speakers.
- Confirm the receivers are powered on and placed sensibly.
- Confirm each receiver output goes to the intended input.
- Test one microphone at a time and identify the exact channel.
- Raise only that channel enough to confirm clean vocal sound.
- Add the next microphone only after the previous one is stable.
- Keep unused microphones muted or lower in the mix.
- If the room becomes unstable only with several active mics, stop changing the connection path and address live mic control instead.
If a multi-mic setup is connected properly but still feels noisy, unstable, or feedback-prone, do not keep rebuilding the wiring first. Strip the setup back to two active microphones, confirm the room behaves, then add more only if needed.
When Connection Is Not the Real Problem
Some rooms connect correctly but still feel difficult once several people start singing. In that case, the problem is no longer the connection path. It is usually live microphone control.
Extra microphones increase room pickup. More singers move around. Someone may point a mic toward the speakers, hold it too far away, or leave an unused mic open on the couch. The wiring may be correct, but the room still becomes harder to manage.
When that happens, the next step is not more cable changes. The next step is controlling how many microphones stay active, where singers stand, how microphones are handled, and whether echo or reverb settings are too aggressive.
For that situation, read Managing Multiple Karaoke Microphones Without Feedback. That article focuses on live multi-mic control after the microphones are already connected.
Frequently Asked Questions
Can I use two different wireless microphone sets in the same karaoke setup?
Yes. Many home users do this successfully. The important part is keeping each microphone and receiver path clearly labeled and routed into one main karaoke control point. The more mixed the setup becomes, the more important organization becomes.
Should each wireless receiver go into a separate input?
In many home setups, yes. Separate inputs make testing and balancing easier because each microphone path is easier to identify. What matters most is that all live microphones still reach one clear control point where they can be managed together.
Why does one microphone cut out more often than the others?
That usually points to a channel-specific issue rather than a full system problem. Start by checking battery strength, receiver placement, channel assignment, and whether that microphone is being used farther from the receiver area than the others.
Is a four-mic setup always better than a two-mic setup?
No. A four-mic setup gives more flexibility for group singing, but it also creates more channels to manage and more opportunities for feedback or confusion. If most sessions involve only one or two active singers, a cleaner two-mic workflow may feel better.
Can I leave all wireless microphones turned on?
You can, but it is usually not ideal. Extra live microphones add room pickup and make the system harder to control. Keep only the microphones being used active, especially in smaller or more reflective rooms.
What should I do before a party?
Test the music source first, then test each microphone one at a time, check batteries, label the channels, and keep the receiver area easy to access. A quick setup check prevents most multi-mic confusion before guests start singing.
Once the microphones are connected cleanly, the next step is making sure group singing stays controlled when several voices are live.
See the Karaoke Setup Checklist Before a Party


