Search
English
RSS

Blog posts of '2017' 'July'

How to breed koi fish
(0) How to breed koi fish

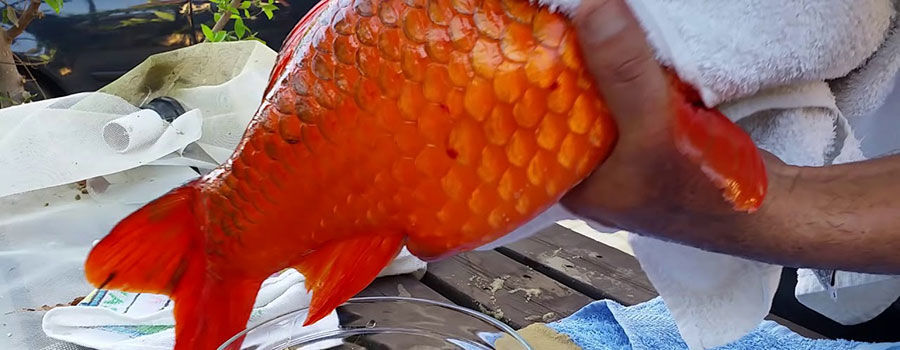
Breeding koi fish takes a lot of effort and patience on the part of the breeder/owner. Selecting the right breeding partners and preparing everything from the breeding environment down to the spawning process takes a bit of time, also.

To ensure success, it is important to learn about rearing the species the right way. Raising Koi as your pet might not be easy in the beginning, especially for a newbie. You have to consider so many factors.

To learn a better way of breeding Koi, you have to familiarize yourself with some of these tips. Remember that first-time activities always involve a trying and failing, that is applicable in all life situations including Koi breeding.

FACTORS TO CONSIDER WHEN BREEDING A KOI FISH

  1.      The Size Of The Pond

One thing you should always keep in mind is the size of your pond as it will affect their overall size. Obviously, even the numbers that you breed has an effect on their growth as well. Keeping a large pond and maintaining a large number of Koi is the same as keeping a small pond and maintaining a small number of Koi – this affects their interaction and hinders their size. In order to keep 8 Koi fish, you need to build at least a king-size bed pond. If you have enough space in your garden, this shouldn't be a problem. This is on the ground that you want to breed big-sized Koi fish.

  1.      The pH Level Of The Pond

Your pond needs to maintain a standard pH level of 7.4 and exceeding 8.0. Seashells and corals can be used in your filtration system to neutralize your pond’s pH level in the event that it drops down.

  1.      Perfect Breeding Month For Koi

The best month to start breeding Koi is between April and July.

  1.      Nutrition

It is very important that you sustain your fish with nutritious food that keeps their color bright and alive. Vibrant colors are an indication that your Koi fish is in its perfect state of health. You may feed them with fruits and veggies such as cabbage, melons, and lettuce. Commercially prepared fish food can also be used to provide all the necessary nutrients to preserve your fish’s health.

STEPS INVOLVED IN KOI BREEDING

After taking note of these factors, it’s time to breed your Koi!

  1.      Setting Up Your Breeding Environment

Using water hyacinths work well with outdoor ponds. Set up your pond in an environment that will encourage fish breeding. You will not want to see your beautiful jewels jump outside the pond or have them eaten by insects. This is why we employ breeders to place a net over their outdoor pond. Set up your breeding environment to ensure one male is assigned to one female fish. The population of males should not outnumber the females over 2 to 1.

  1.      Choosing Your Fish

Obviously, your breeding pond will be stocked with both male and female Koi. You can identify a male Koi by the spots on its pectoral fins and gill cover while females have larger abdomens during the breeding season.

It is important to select males and females that are of similar sizes. For breeding purposes, females need to be at least two years old. The perfect age for breeding a female Koi is around four years. Younger females produce thinner eggs with a lesser chance of survival. Likewise, the eggs of older fish are too hard for the sperm to penetrate.

  1.      Perfect Color Combination

Your preferred color pattern and the combination will determine your choice of breeding partners. Of course, different offspring are produced from a different combination of color, so it is important to do extensive planning and research. Gosanke is the most popular Koi with an unlimited color pattern. Consult Koi specialist and read Koi breeding materials else, you’ll end up being disappointed when you realize that the offspring aren’t to your liking.

  1.      Selecting Healthy Breeding Partners

Having two males with a matured single female that is ready to spawn is a good idea. This ensures fertility in most of the eggs. Males that are ready to spawn will develop small bumps on their foreheads and pectoral fins; these are used on tickle the female Koi into spawning.

  1.      Preparing The Spawning Area

Proper preparation of the spawning area will lead to a successful breeding. You should ensure the pH levels of the water, oxygen concentration, isolate the mating trio from others, et cetera. There should also be submerged twigs or underwater plants onto which the female can lay her eggs. The fry will also need a hiding place when they hatch, so take note of this when choosing your medium.

  1.      Isolating The Fertilized Eggs

In order to avoid cannibalism, it is important to separate the fertilized eggs from the parents even though it is not usual for Koi to feed on their own young. Yet, it is better prevented!

  1.      Hatching Of The Eggs

This process typically occurs in about a week. A month after hatching, it is best to cull out the bad fish and high-quality stock. Continue culling out the fish every week until you have a high-quality pond of new fish. They will look for spots like branches or grass or the pond wall to develop.

These new sets will serve as new breeders in the future and should only be fed 3-4 days after. Brine shrimp and yolks from hard-boiled eggs are a good starter food. You can also visit the fish store to get nutritious fry food. An indication as to know when they are ready to eat will be when you see them swim around the pond in a group.

Four days after hatching, you are advised to remove the breeding material – this reduces the ammonia levels on the water and evacuates unhatched eggs. With thousands of fry, there will be limited space in the pond to keep a lot of waste gathering. Get rid of these wastes and add fresh water regularly to improve the quality. It is important to know that only half of your baby Koi will grow into an adult. This is why proper care of your Koi will help maintain a high-quality standard for the future generation of Koi.

  1.      What To Do After The First Three to Four Weeks

You will need to move the fry to your pond or another tank when they are about three to four weeks old. Make sure you keep an eye on them because the bigger and stronger fry might eat the smaller ones, so split them into separate tanks if you need to. At this stage, your Koi will start growing fast so proper and frequent feeding is necessary. However, be careful not to overfeed them as they will get too fat and lose some color.

  1.      Introducing The Fry To The Main Pond

Once your Koi have grown to around 7-8 inches, you can now introduce them back into the main pond, but keep an eye out to see if the bigger Koi do not pose a threat to them.

CARING FOR THE KOI FISH

Proper care for your Koi fish will require you to know the seasonal care. That is because every season means a different caring need which demands a different caring approach. For instance, during the spring season, the temperature of the water is can either rise or fall at any time. It is therefore important to focus more on the water temperature of the pond of the Koi as irregular fluctuation of water is not good for the Koi fish.

Koi fish are known to thrive in the mud ponds due to the rich mineral content in the ponds. These minerals add to the overall health and color of Koi fish. Bentonite clay contains over 60 minerals that will help your fish grow up healthy if sustained with bentonite clay-rich foods. More so, when bentonite clay is added directly to pond water, it will bring about stability in the pH level of the water. When water temperatures reach 75° F, Koi will need to maintain a high protein diet because at that point their metabolism is at its peak. This is the period where they get to be fed two to three times daily.

Providing your Koi fish with adequate and appropriate sources of food is essential to the health of the fish. When feeding is concerned, you must consider several basic factors such as the size of the pond, the season, the number of fishes in the pond, and they type of filter that is used.

Always make sure you take proper care of the pond as well. Cleaning the filters, supplying fresh water, et cetera makes a neat pond and a neat pond will be void of diseases and insects.

Pink Snow Flake Nail Art
(0) Pink Snow Flake Nail Art

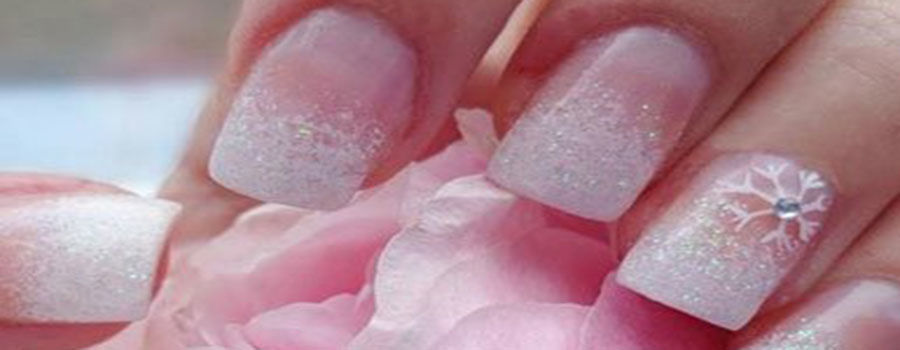
Snowflakes mark the fantastic holiday season with Christmas just around the corner. Exhibiting the best snowflake designs in the nail art is indeed one classic act. Only a few years ago, the most delicate nail art could only be attained at salons or from professional nail artists.  Today, the trend is so common that only a little practice can help you relish the professional nail art look in no time. Conventionally, snowflakes are made by artists in cool colors such as the shades of blue and purple.  However, pink snowflakes are a rage these days and a trend that has just emerged recently.  Let our step by step guide to help you create some perfect snowflake pattern on your nails to kick start the holiday season with unique bravura.

Full Nail Pink Snow Flake Nail Art:

Full nail snow flake design is meant to make the snowflakes look eminent on your nails. It looks like an intricate pattern, but with the steps mentioned below, you will find it to be a simple design to recreate at home.


STEPS:

  •         Choose some base color in light shades. Using a thicker brush will offer you the luxury of an even coat.
  •         The base is ready, and now it’s time to draw some perfect snowflakes. Use some thin brush with dark pink color to highlight the snowflake on the light base. Conversely, you can use a dark pink base and use white color to create flakes.
  •         Use your thin brush to make a cross.
  •         Cut this cross with another straight line.
  •         Now mark two arrow heads on each line away from the center point.
  •         Repeat the process thrice to highlight the snowflake.
  •         Once you are happy with your snow flake, spray it with clear water repellent to help it last longer on your nails.
  •         Spilling some glitter will enhance the elegance.

Follow the above steps to relish the unique pink snowflakes nail art at your home with the assistance of your besties. Alternate the pink base with other light colors like purple or yellow. Whatever the base is, the result will be an eye catching snowflake nail art.


Halloween Nail Art
(0) Halloween Nail Art

Halloween isn’t only about choosing some freaky costume but in fact demands a complete physical transformation. To attain your Halloween perfection, selecting a suitable nail art will prove its worth. It’ssure to impart a unique look for your Halloween night functions and gatherings. With our step by step guide, you will be able to design and draw the nail art of your choice with ease.  Practice your design a couple of times, and you will be able to get a professional look for your Halloween nail art at home.

Spider Cobweb Nails Design:

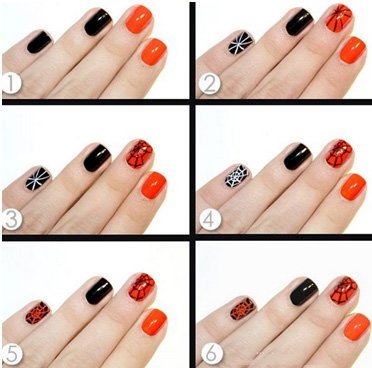
Whenever it is about spookiness, cobwebs are the first element to come into play immediately. The strange effect offered by the cobweb nail art is fascinating and indeed superior to other famous Halloween nail arts. It’s creepy, spooky but exquisite at the same time. Now stop planning to visit a professional nail artist to attain this flabbergasting nail art and start right away.


STEPS:

  •          Choose any coloras the base of the nail art.
  •          Choose two contrastcolors on every other finger.  It is always the most stylish choice.  For the Halloween, go with black and orange base colors as they are very prominent and will let the black and white web look eminent.
  •          Paint the base with black and orange smoothly so that there are no over do’s or gaps left. Use a rather thicker nail brush for this purpose.
  •          Choose awhitecoloron black and black color on orange base for drawing the best web structure.
  •          Pick a center point of the nail. This can be at the center, towards the periphery or anywhere on the nail.
  •          Draw two crosses intersecting each other on each nail.
  •          Make small curvy lines to interconnect these lines along the length to give a compact formation.
  •          Spray the water repellent to make it look shiny and brighter.

step by step halloween nail art

Halloween nail art should match the mysterious and spooky element of the whole theme.  Using black and orange color is always the safest choice for Halloween but you can play with the colors of your choice or to suit your outfit and theme. 

Fourth of July Nail Art
(0) Fourth of July Nail Art

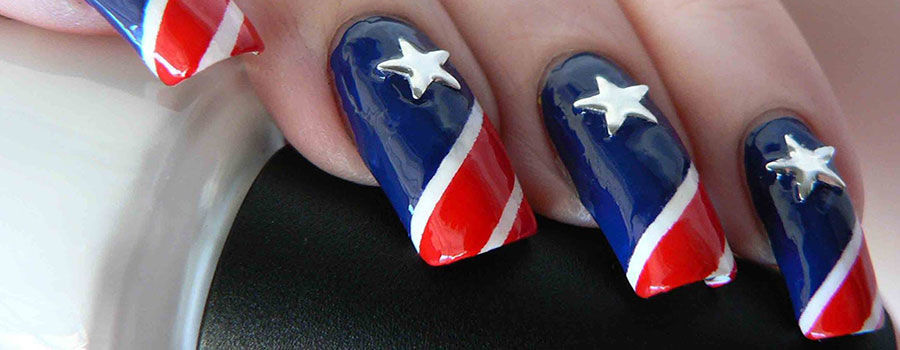
Fourth of July not only marks the independence day of USA but also a resounding signal of summer celebration around the country. There are millions of designs of mesmerizing nail art to perfectly execute fashion and patriotism all in one. The striking designs from red, blue and white colors are unmatchable in elegance and bravura. Browse the internet, and you will end up finding thousands of elegant designs to mark your independence day with modern style. From carving the perfect American flag, the independence stripes, every independence nail art is here to depict the real emotions of independence of a great nation.

Flag Nail Art:

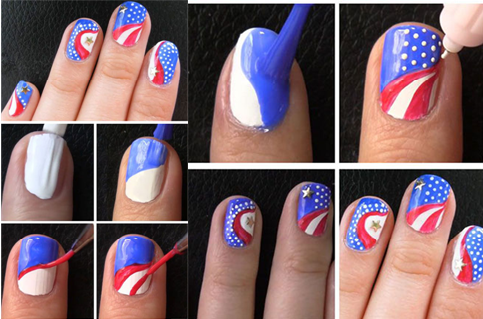
Flag nail art is typical, yet it never stops inspiring the patriotic feelings in everyone. This nail art is a must to celebrate independence with style and elegance. Creating a flag on a tiny nail seems impossible, but our step by step guide is sure to solve your problem. Just keep it simple with few stars or only add white dots in the blue area followed by red and white waves.  It will give you a perfect depiction of the national flag.

The Fourth of July Nail Art

  •          Choose bright red, blue and white colored nail paints.
  •          Use the white color to coat the base thoroughly.
  •          Put two or three coats to ensure smoothness.
  •          Use blue nail paint to cover the half of the nail in a waveform as shown in the image.
  •          Other half is marked with red stripes using an ultra-thin nail paint brush.
  •          Use thin brush or toothpick to put white dots on blue area.
  •          The addition of glitter in the end, will add an excellent finish to this fantastic patriotic nail art.

Celebrating Independence Day with a cool nail art that not only lets your relish the patriotic emotions but also lend you style in the heat of summer is one brilliant idea. Select your favorite nail art and kick start the Independence Day celebration with perfect looks.

Christmas nail art
(0) Christmas nail art

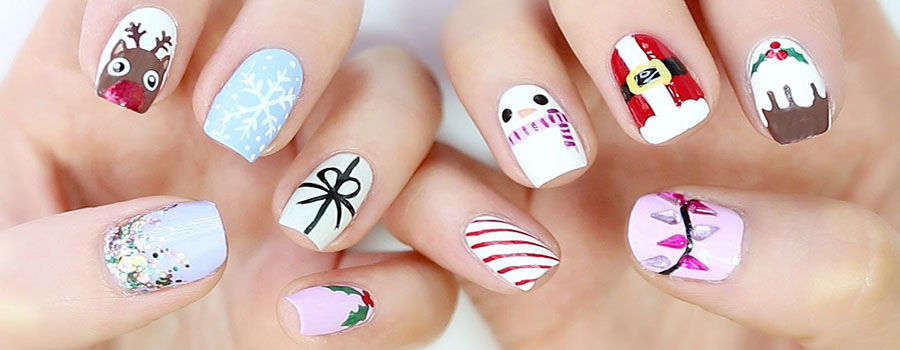
Nail art exhibits the unique and trendy fashion sense. Every festivity is marked with some finest and new nail art to relish the moment and create an everlasting fashion statement for you. Christmas is all about joy, fun, colors, and life. Many prominent things symbolize the Christmas festivity like Christmas tree, Santa, jingle bells, snowflakes, and gifts. But the most fantastic and lively feature of Christmas is the lights. Christmas lights are not only used to decorate the Christmas tree but also the exterior and interior of the house. These lights are the first and foremost indication of joy and sheer fun coming ahead. Depicting this brilliant feature of Christmas in the form of Christmas lights nail art is indeed unique and very fascinating. 


This simple yet exquisite nail art can mark your Christmas with unforgettable memories and style that will be hard to ignore. It is delicate, trouble free and very easy to adopt. With only a few nail art brushes and a smooth hand, you can achieve this beautiful nail art at your home without seeking the services of professionals.

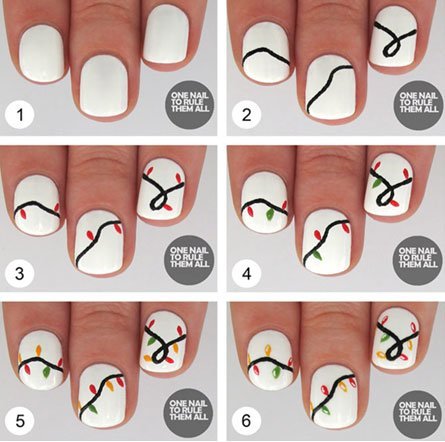
step by step Christmas nail art

STEPS:

  •          Use white nail paint as the base of your nail art.
  •          Use a thicker brush to achieve a smooth coat.
  •          Use a thin paint brush and draw a random line across the width of the nail.
  •          The similarthin brush is then dipped in bright nail colors like red, green, blue and yellow to make tiny ovular lights across the black line.
  •          Vary the shape of the line by inserting a few loops and breaks.
  •          Spray the water repellent to complete the fine finish.

This nail art is meant to provide you the extravagant Christmas looks with gorgeous nails. It’s a freehand design with no complex figures and drawings involved. Just feel free to add modifications in colors and shapes of the lights according to your taste.

Butterfly Nail Art
(0) Butterfly Nail Art

Butterflies are indeed the most beautiful arthropod species. Someway they are associated with nature and beauty. Butterfly nail art is popular and gives an elegant finish to any get up for summer holidays, spring parties or even the most glamorous gatherings. Despite the fact that there are millions of other nail art ideas out there in the world, the butterfly nail art is distinguished due to its extreme relevance with nature and beauty. Moreover, it symbolizes the unique combination of sensitivity and glamor. Here is a step by step guide for your butterfly nails that you can create at home with minimal effort.

Comprehensive Decal Sticker Butterfly Nail Art:

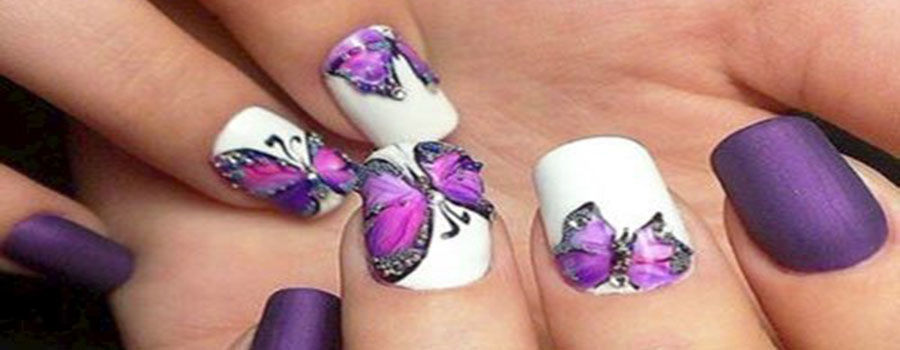
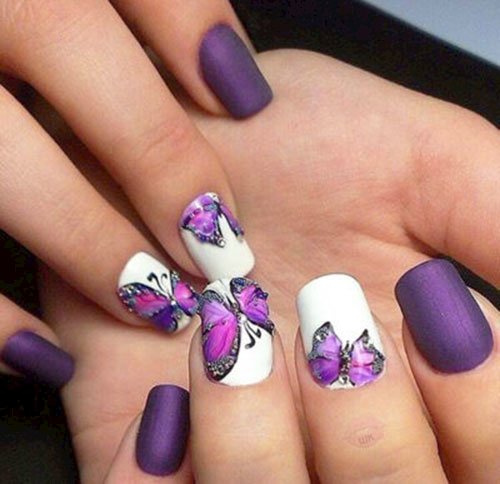
Attaining the best butterfly nail art is not impossible at home now. You don’t need to spend money for getting this glamorous design through a nail artist. Just buy yourself some common nail art tools and a few decal stickers of butterfly nail art.

butterfly nail art picture

Steps to get Butterfly Nail Art:

  •          Use an alternate color base on nails to highlight the butterfly nail art.
  •          Put three coats to give a smooth finish.
  •          Dip four decal stickers in water for 20 minutes until the black outline is prominent.
  •          Carefully place the sticker on the nail.
  •          Decal stickers offer a quick replacement for complex designer art.
  •          Use some cotton swab or ear swab to mark purple and indigo dots in the mid.
  •          It will offer a natural feel to the butterfly wings.
  •          Use glitter with a toothpick to mark the boundary of butterfly wings.
  •          Finally, spray the water repellent spray to give a bright and shiny finish.

Here is your butterfly nail art ready and geared up to offer you the ultimate holiday look. The butterfly design can vary in butterfly shapes and colors. Choose your favoritecolor and shade for these tiny and delicate butterflies. 

How to make an aquaponics pond system
(0) How to make an aquaponics pond system

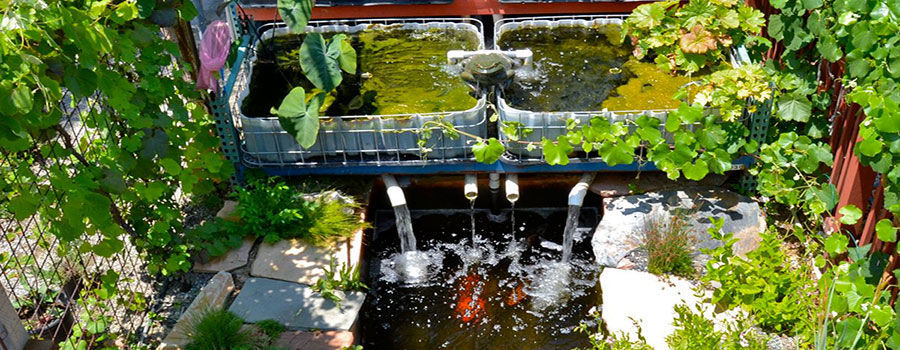
Aquaponics is the combination of fish breeding and vegetation together, using nutrients from fish compost for the plants. Before you start working on an aquaponics pond system, you need to have some basic knowledge about it.

In this article, we will be discussing the components and steps involved in making an aquaponics system.

MATERIALS NEEDED TO BUILD AN AQUAPONICS POND SYSTEM

  • A double outlet air pump
  • A pond bin – 250 Liter
  • Some roof tiles and bricks
  • A 1000 L/ph pond pump
  • A grow tub – 150 Liter
  • A garden hose
  • A bird wire
  • Some tomato plants
  • Gravel
  • An extension cable
  • A surge protector or a digital timer
  • Fishes

STEPS INVOLVED

  1.      Digging

Digging is the first step in the process; it involves digging a small hole (below ground level) for your fish tub to achieve a desired water temperature. Ensure that you provide a shade to prevent evaporation.

  1.      Grow Bed

Obviously, fish water will be pumped in your grow bed. The grow bed where the plant is bred; it is usually 300mm long and must be firmly positioned above or alongside the container. The surface area of the bed ought to be tiny rocks and should be placed prior to the seeds. Cucumber, green spinach, lettuce, tomato, and other green leafy vegetables are examples of plants to be used.

Note: the grow beds need holes to ensure that water can strain back towards the aquarium with ease.

  1.      Pump Motor

There are two types of pump; an air pump and a pond pump motor. After deciding on the fish’s location, a waterproof cable is used to connect the pump to an electric outlet.

  1.      Time For An Electronic Digital Timer

An electronic digital timer will help you control the turning on/off of the pump, and also schedule your pump motor’s activity. The timing is dependent upon how long it will take for water to fill your grow bed.

After supplying water to the bed, you can now perform series of test to see if the water is circulating and flowing. If everything is working perfectly, you can now add the fish into your fish tub.

  1.      Gravel

As of now, the water flow may be too fast and so needs to be minimized. Adding gravel can be an ideal solution to an increased water flow. Add more gravel gradually to your grow bed before dropping some seeds. This time you sit tight for germination to occur because seed grown will require a little bit of patient.

  1.      Monitor PH Level and Water Temperature

Monitoring the water temperature and PH level will ensure that your fish and plant are bred in optimum conditions.

Feeding is likewise important; it is recommended that you feed your fish with potassium bicarbonate and calcium bicarbonate in the right amount.

Fishes that are perfect for the aquaponic system are jade perch, silver precious perch, goldfish, jade, barramundi, and ornamental bass.

How to build an aeroponics system
(0) How to build an aeroponics system

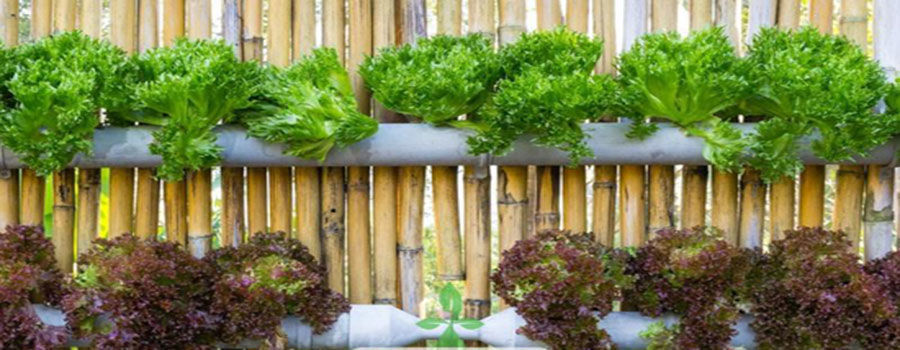
Aeroponics is a very simple way to grow herbs and veggies. Commercial aeroponics are fairly expensive, this encouraged people in building their own aeroponics.

Commercial systems usually have calibrated pumps that are supplied to the plants between feeding times. Hence, we could say, the feed times are programmable.

Building your own aeroponics requires petty materials such as:

MATERIALS NEEDED

  • On/off regulator
  • Gallon Tote with Lid
  • Threaded bulkhead fitting with gasket
  • Threaded connectors
  • PVC connectors
  • Misting spray nozzles
  • Poly tube extenders
  • Clear tubing and angle connectors
  • Black flexi-tubing
  • Hose clamp
  • Flexi-tubing shut off valve
  • Net pots
  • Fountain Pump
  • Container of 100% Silicon Caulking
  • Indoor/Outdoor Electrical Timer

TOOLS

  • Caulking Gun
  • Saw
  • PVC Primer and Glue
  • Hole Saw
  • Drill
  • Teflon Tape
  • Measuring tape
  • Safety Glasses
  • Utility knife

This suggestion is streamlined, and the outcomes are primitive; however, if this works out well you can build a better and bigger one later on.

The water and nutrients will be carried by 1/2" poly tubing. You will also need a few poly connectors, obviously. Some poly tube extenders will also be employed to mist the roots higher.

Only use host fittings that can be attached to the pump. Carefully cut your holes for your net pots using an Exacto knife instead of the hole saw and drill. Ask for net pots as well as 12” of tubing and angle connectors. Use the net pots in the enclosed tank you’ve created to enable you to utilize the aeroponics system to from your plants.

Use the PVC glue and primer to connect the PVC pieces to their respective PVC elbow connectors.

Place the PVC sprinkler unit inside the tote. A fountain pump will enable you to rotate the water and nutrients into a constant supply of the water and nutrients if you wish. Connect the fountain pump with the 1/2" flexi-tubing to the PVC unit. Make sure there are no curves in the tubing. The pump is placed on the net pot holes. Ensure that your fountain pump fits easily through the hole.

Insert the net pots with foam lids. Using a large heavy-duty plastic container, drill 2” holes in the lid space. Avoid drilling through the plastic ribbing that serves as the strength source of the container.

Misting spray nozzles will carry out misting on your plants. By running the misting spray nozzles, each plant’s root will be surrounded with water and nutrients. You can set your times to a cycle of 40 minutes on and 40 minutes off. Just fill with water to just below the sprinkler heads. Don’t worry about wasting water or nutrients, any runoff surrounding the lid will return back into the plant.

This conventional method is quickly becoming the most preferred method of building aeroponics. This is mainly because your water remains intact as long as its quality stays clean. More so, you don’t need additional nutrients to your water.

How to setup a homemade hydroponics system
(0) How to setup a homemade hydroponics system

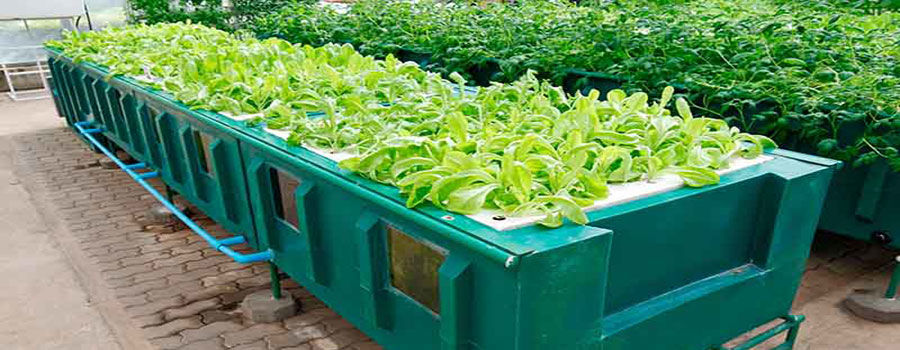
The benefits of a homemade hydroponic system are numerous. They are quite easy to make and can be measured to fit any available space.

As a hydroponic gardener, you can either choose one of the hydroponic kits or enjoy making your homemade hydroponic growing system. Creating a hydroponic system yourself makes you know the source of the food, how hygienic it really is, and who handled it.

While setting up a homemade hydroponics system, you will need these basic materials:

  • Reservoir
  • Pots - made of mesh or nets
  • A growing medium
  • Nutrient solution
  • Air stones
  • Tubing and an air pump
  • Styrofoam
  • A box cutter or sharp knife
  • A measuring tape

SIMPLE STEPS

Choosing a Good Reservoir

A bucket, bin or a fish tank could serve as a good reservoir. In fact, any container that fits all your desired number of pots for your plants could serve as one. If your reservoir is transparent, you will need to paint it black. This is to prevent the growth of algae and other bacteria each time light penetrates into it.

In the reservoir, the plants will be sitting with its roots filled with nutrient solution. Constant air bubbles will gently be provided by an external air pump to the solution, supplying oxygen to the roots. You could also cut an extra hole in the lid for air to pass through to the bottom of the container.

Mark a Gauge

The next step is to mark a gauge. This can be drawn with a straight line; it helps to monitor the nutrient solution and water level. At that point, use a measuring tape to get the dimensions.

Now, cut the Styrofoam into pieces – typically 1/4th of an inch smaller than the size of the reservoir. This ought to be on top of the nutrient solution as it serves as your floater can also adjust to water level changes.

Cutting Holes to Place Your Pots

It is time to cut holes where you will place your pots. These pots should be placed evenly on top of the Styrofoam, creating enough space for sunlight. Also, make another hole for the air to pass through freely. Connect the free end of your air pump to the air stone.

Filling the Reservoir with Nutrient Solution

Run the tubing through the end opening of the Styrofoam and place it in the reservoir. Then again, fill the pots with the growing medium along with the seeds. Put them on the floater, turn on the pump, and that’s all!

Lightening System

After successfully setting, place your homemade hydroponics in a window that receives direct sunlight. In the absence of sunlight, a fluorescent lamp or a high-intensity discharge lamp should be used.

If you find this process difficult or you don’t have time to set up a hydroponic system, go for a kit. The kit includes growing guide, pH kits, nutrients, and everything needed to start up. Just make sure you select the one that best suits your desires!

Pink Roses Nail Art
(0) Pink Roses Nail Art

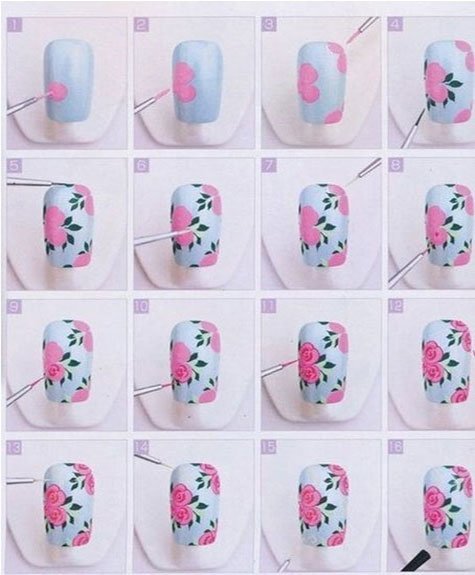
STEP BY STEP PINK ROSES NAIL ART

Nail art is not an innovation anymore, yet its fame and charisma don’t seem to be fading at all.  It is an interesting way to paint and decorate nails. Nail art can be done on toenails as well but are more famous for finger nails.  It is better to shape, trim, and polish nails by manicure and pedicure before nail art. Nail art is trendy among ladies of both Western and Eastern origin. Nail art has seen a lot of diversity in its designs and techniques.  The various methods include painting with brushes, sponging, stamping, using tapes, digital nail art, etc.


PINK ROSES NAIL ART:

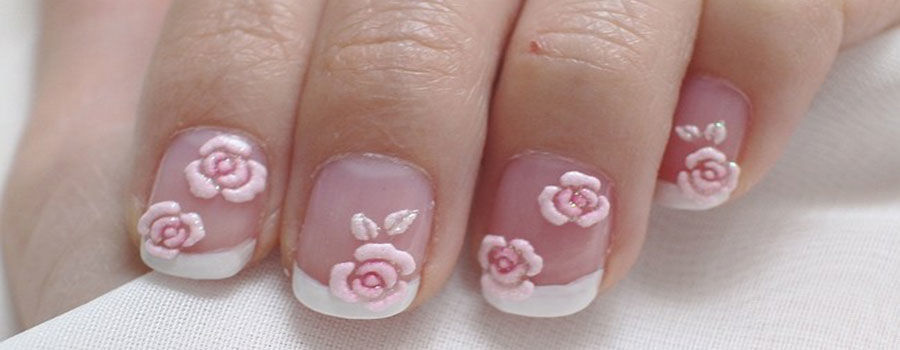
Pink is the color of femininity and roses always attract women for being a symbol of love, compassion, and thankfulness. Pink Roses nail art is a lot easier to make than it seems to be.  No matter how you do it, it always looks cute and attractive, even if you mess it up a little.

For pink roses nail art you will need following things:

  •          Clear Base Coat
  •          Nail Polishes;One nail color for the base (light green or any other light color of your choice), pink nail colors (light, medium, and dark) for rose petals, and green for leaves.
  •          Dotting tool
  •          Thin nail art brush.
  •          Clear Top Coat

PROCEDURE:

  1.       Start off by applying a good base coat, so your nail art remains for longer, and your nail remains protected from all the chemicals.
  2.       Paint your nail with a light color to give your roses a base on which they will pop up due to the contrast in color.
  3.       Make two or more circles as the base of the roses by using the dotting tool.  Use the lightest of the pink nail color. Circles don’t need to be perfect.
  4.       Take nail art brush and shade the roses with medium pink nail color.Make half circle stroke from the center to the outside of the flower.
  5.       Repeat the step 4 with dark pink nail color but don’t overdo it.  All the three shades of pink should be visible in the roses.
  6.       Add some green leaves on the corners of each pink rose.
  7.       Paint a layer of the top coat to finish the look.

pink flower nail art  nail art

Nail art is an old tradition that has gotten a revival due to a multitude of shades and nail tools available to ordinary people.  Nowadays pink roses in nail art are sought by young girls because it’s easy to make yet looks quite intricate.  With the help of some nail art tools, you can give your pink roses many shapes and shades of your choice for your gorgeous nails.